PCbee - Bee Shaped PCB - solar LED light
by QC
Posted on Mon, March 27, 2023 - 02:29:10 PM
PCB Artsy LEDs Bee PCbee
Motivation
Spring weather wakes up my desire to combine stuff I tend to enjoy. As for the plant sitting on the window sill, they grow and start blooming once the first warmer days appear and that's when I thought I should design something pleasing to the eye.
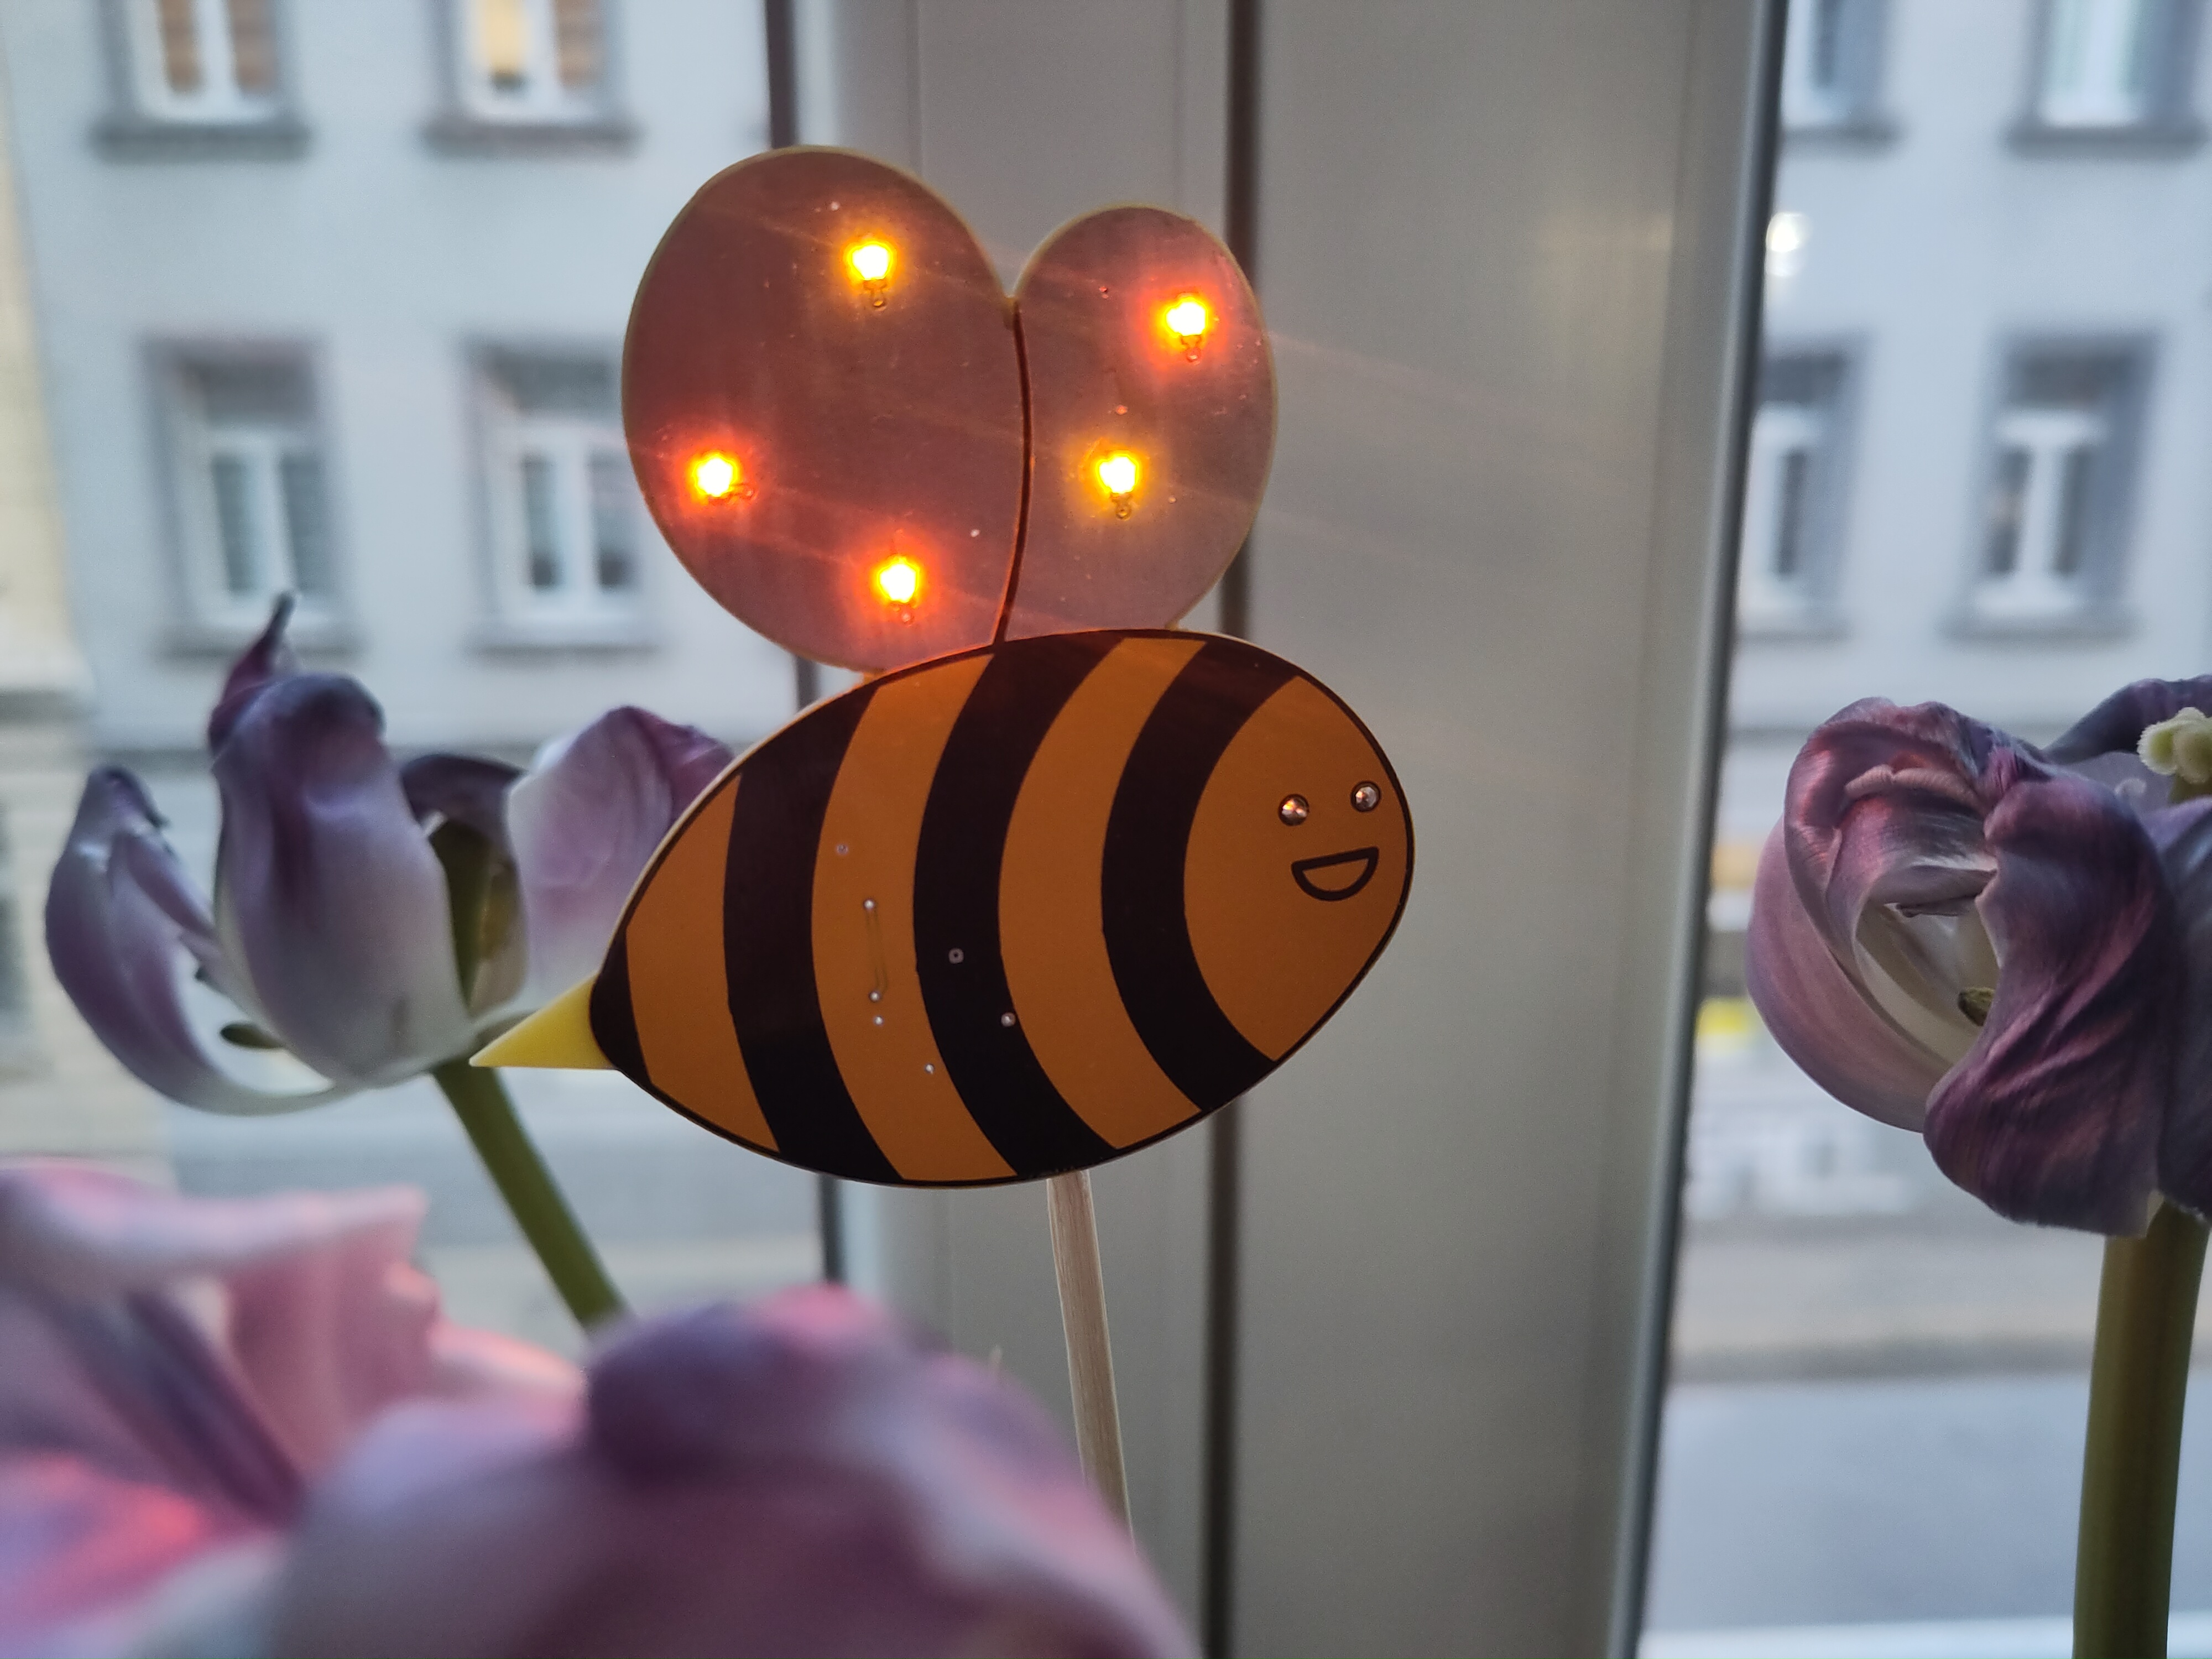
 Glamor shot of the final product around tulips.
Schematics
The circuit is quite straight forwardly built around the QX5252 solar controller. It uses two brand name solar cells which provide the necessary charging current for a 1.2V 40mAh NIMh battery. The cell should be fully charged within 2h of full brightness sun, but probably takes a bit longer due to the non-ideal position indoors.
After the voltage of the solar cell has fallen below 0.3·Vbatt, the controller starts the built in step-up converter feeding the blinking LEDs. Each LED has a separate resistor to be able to use different colors and mix blinking and non-blinking LEDs. With the default configuration, the battery should last for a bit more than 2.5h, practically I've seen it running for 2h on my windows sill.
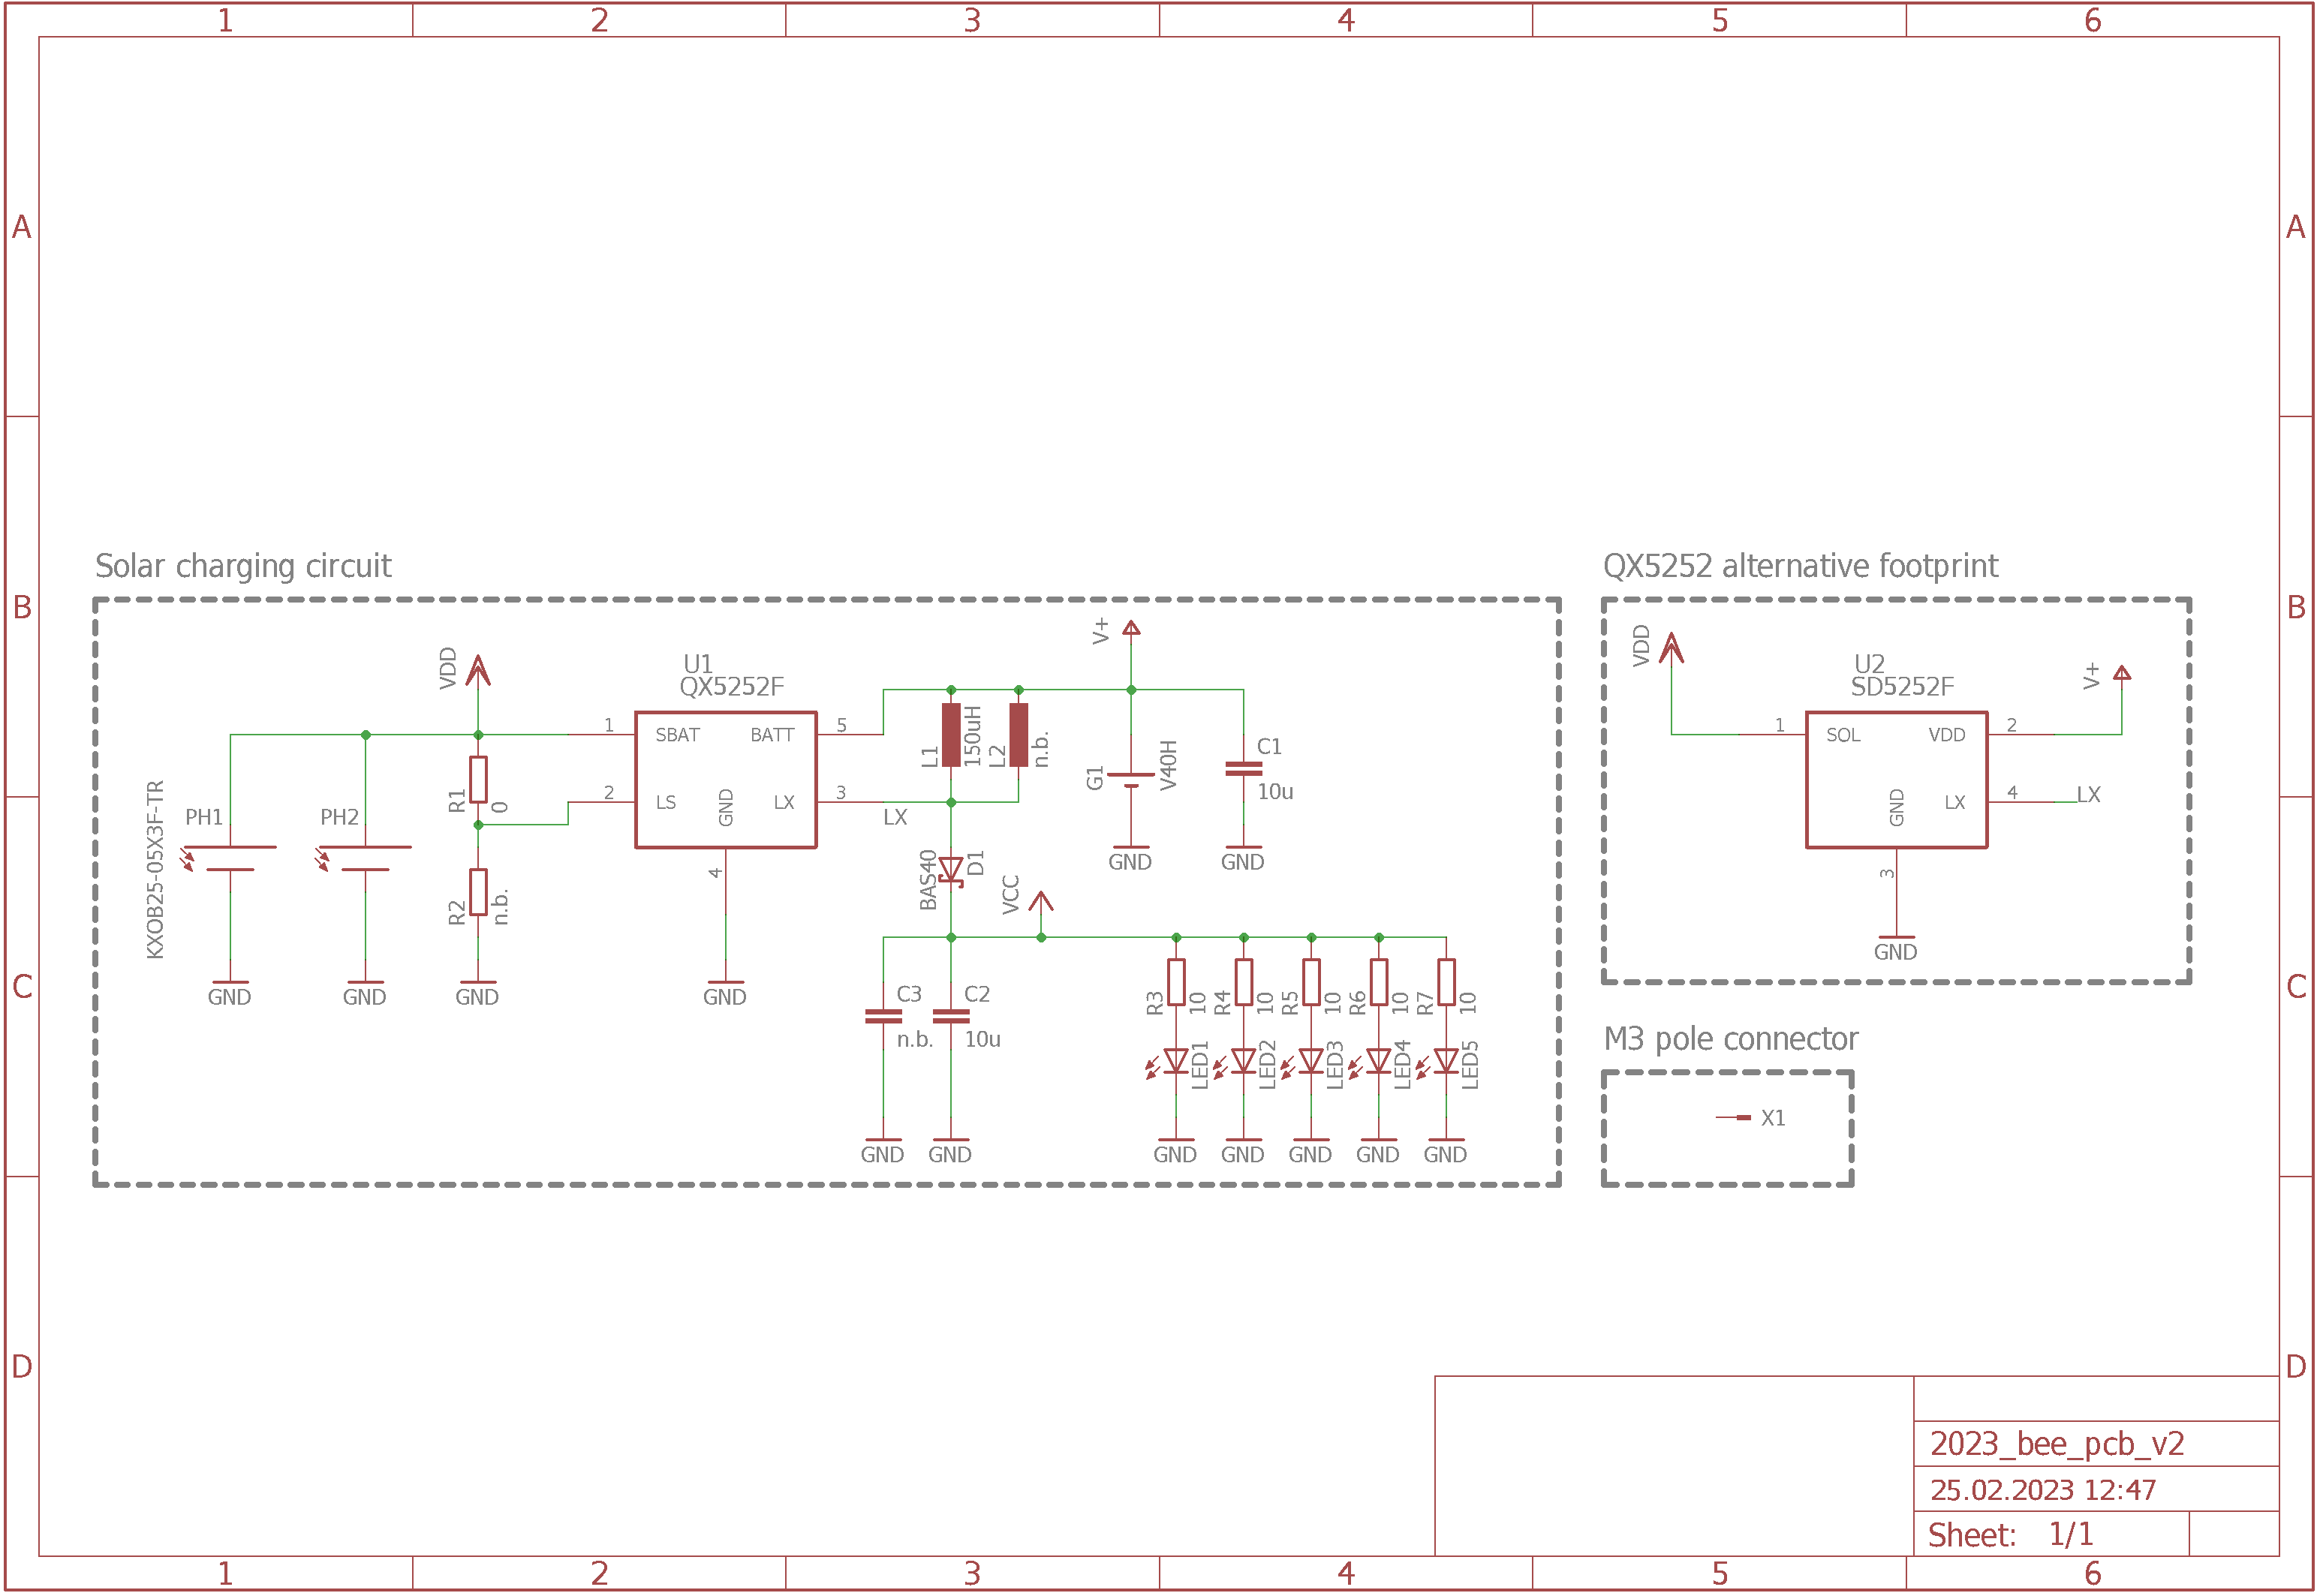 Schematics v2 for the PCbee
PCB
The PCB was a lot of tedious work to get it to the shape of a bee. I'm an engineer, artsy stuff without a technical drawing and dimensions makes me uneasy. Luckily my pretty lady helped me there and together we found a contour that fits. The PCB uses a lot of layer trickery, with exposed copper, silkscreen color, solder mask color, polygon stop and strategically placed mounting holes.
On the bottom there is an unreasonably expensive M3 threaded pole connector. It can be used with sharpened bamboo sticks or just any other M3 screw or rod. Feel free to post your mounting positions, I'm curious to find out.
Due to the prototypiness, there are a bunch of additional footprints, to add extra capacitors, inductors or different controller footprints. It can even be used with an external LDR to adapt the light levels used to switch on the LEDs.
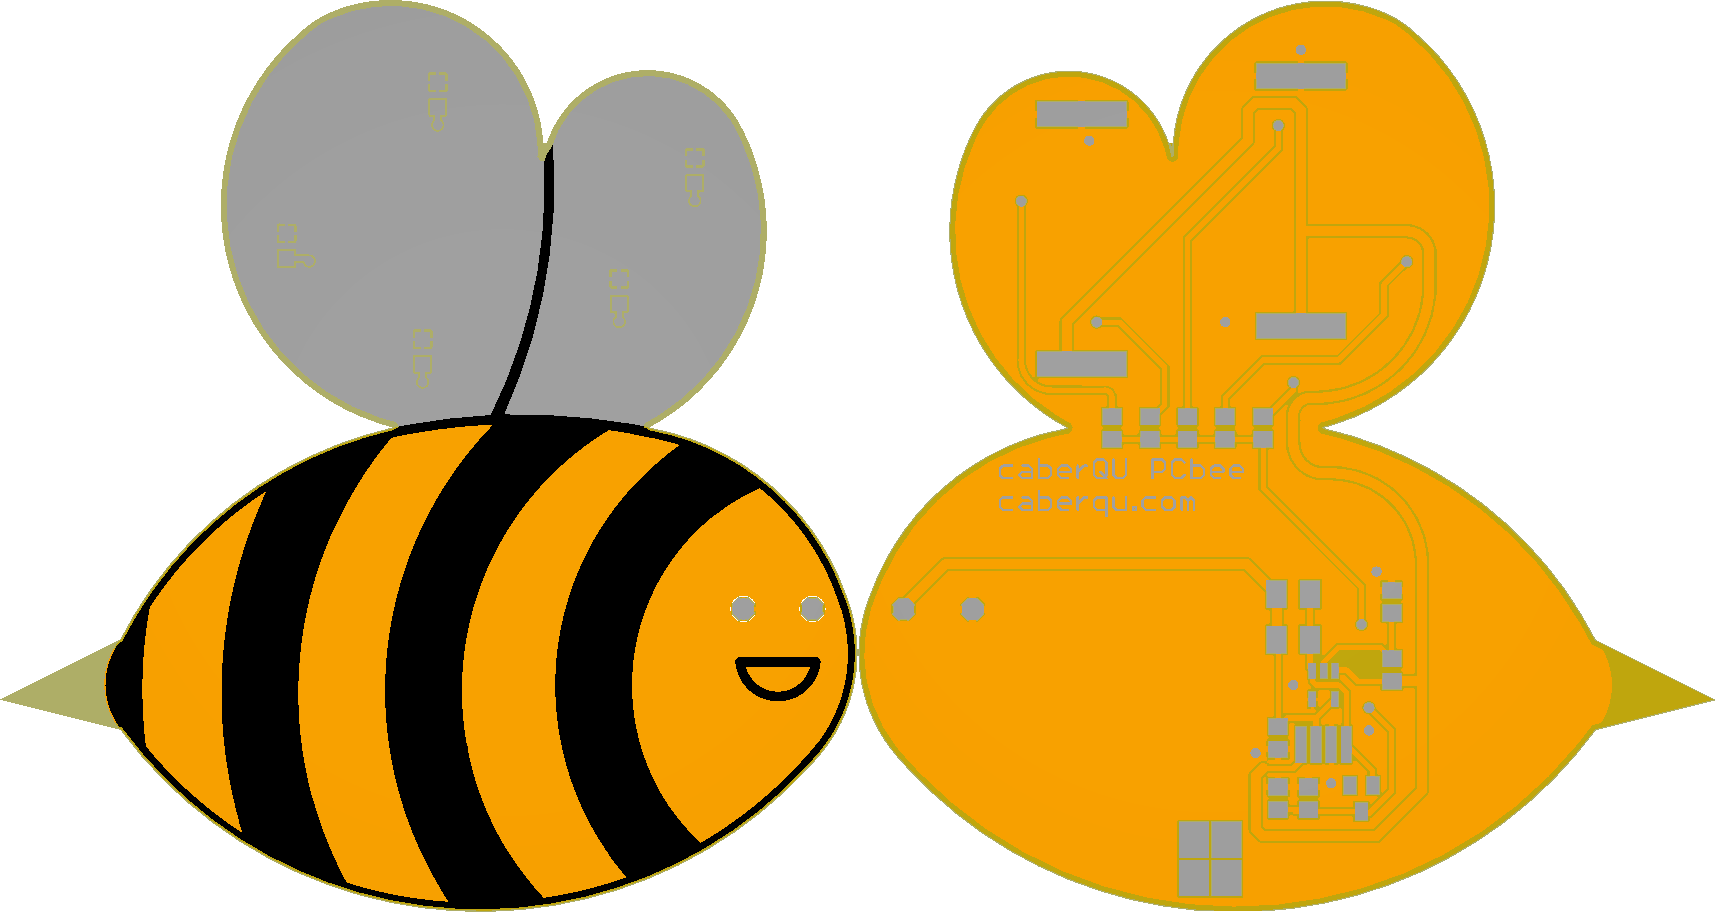 PCB screenshot top and bottom.
Conclusion
Obviously there needs to be a video, so you can also enjoy the view. The project itself is really interesting and in my opinion looks quite pleasing. The parts used turned out to be surprisingly expensive though. The PCB has to be manufactured at a special place due to the uncommon specs, the parts are unusual and hard to get and the solar cells only available from one supplier. This makes it a nice gift for someone really into electronics and not so much of a mass manufactured item.So that's that, I hope this guide didn't get too long. All the files are on github so you can download them and browse through. If you have any questions or feedback just write a message or leave a comment <3