Rechargeable LED bicycle helmet light
by QC
Posted on Tue, August 24, 2021 - 06:41:01 AM
ATTiny PCB cycling Arduino Eagle
Motivation
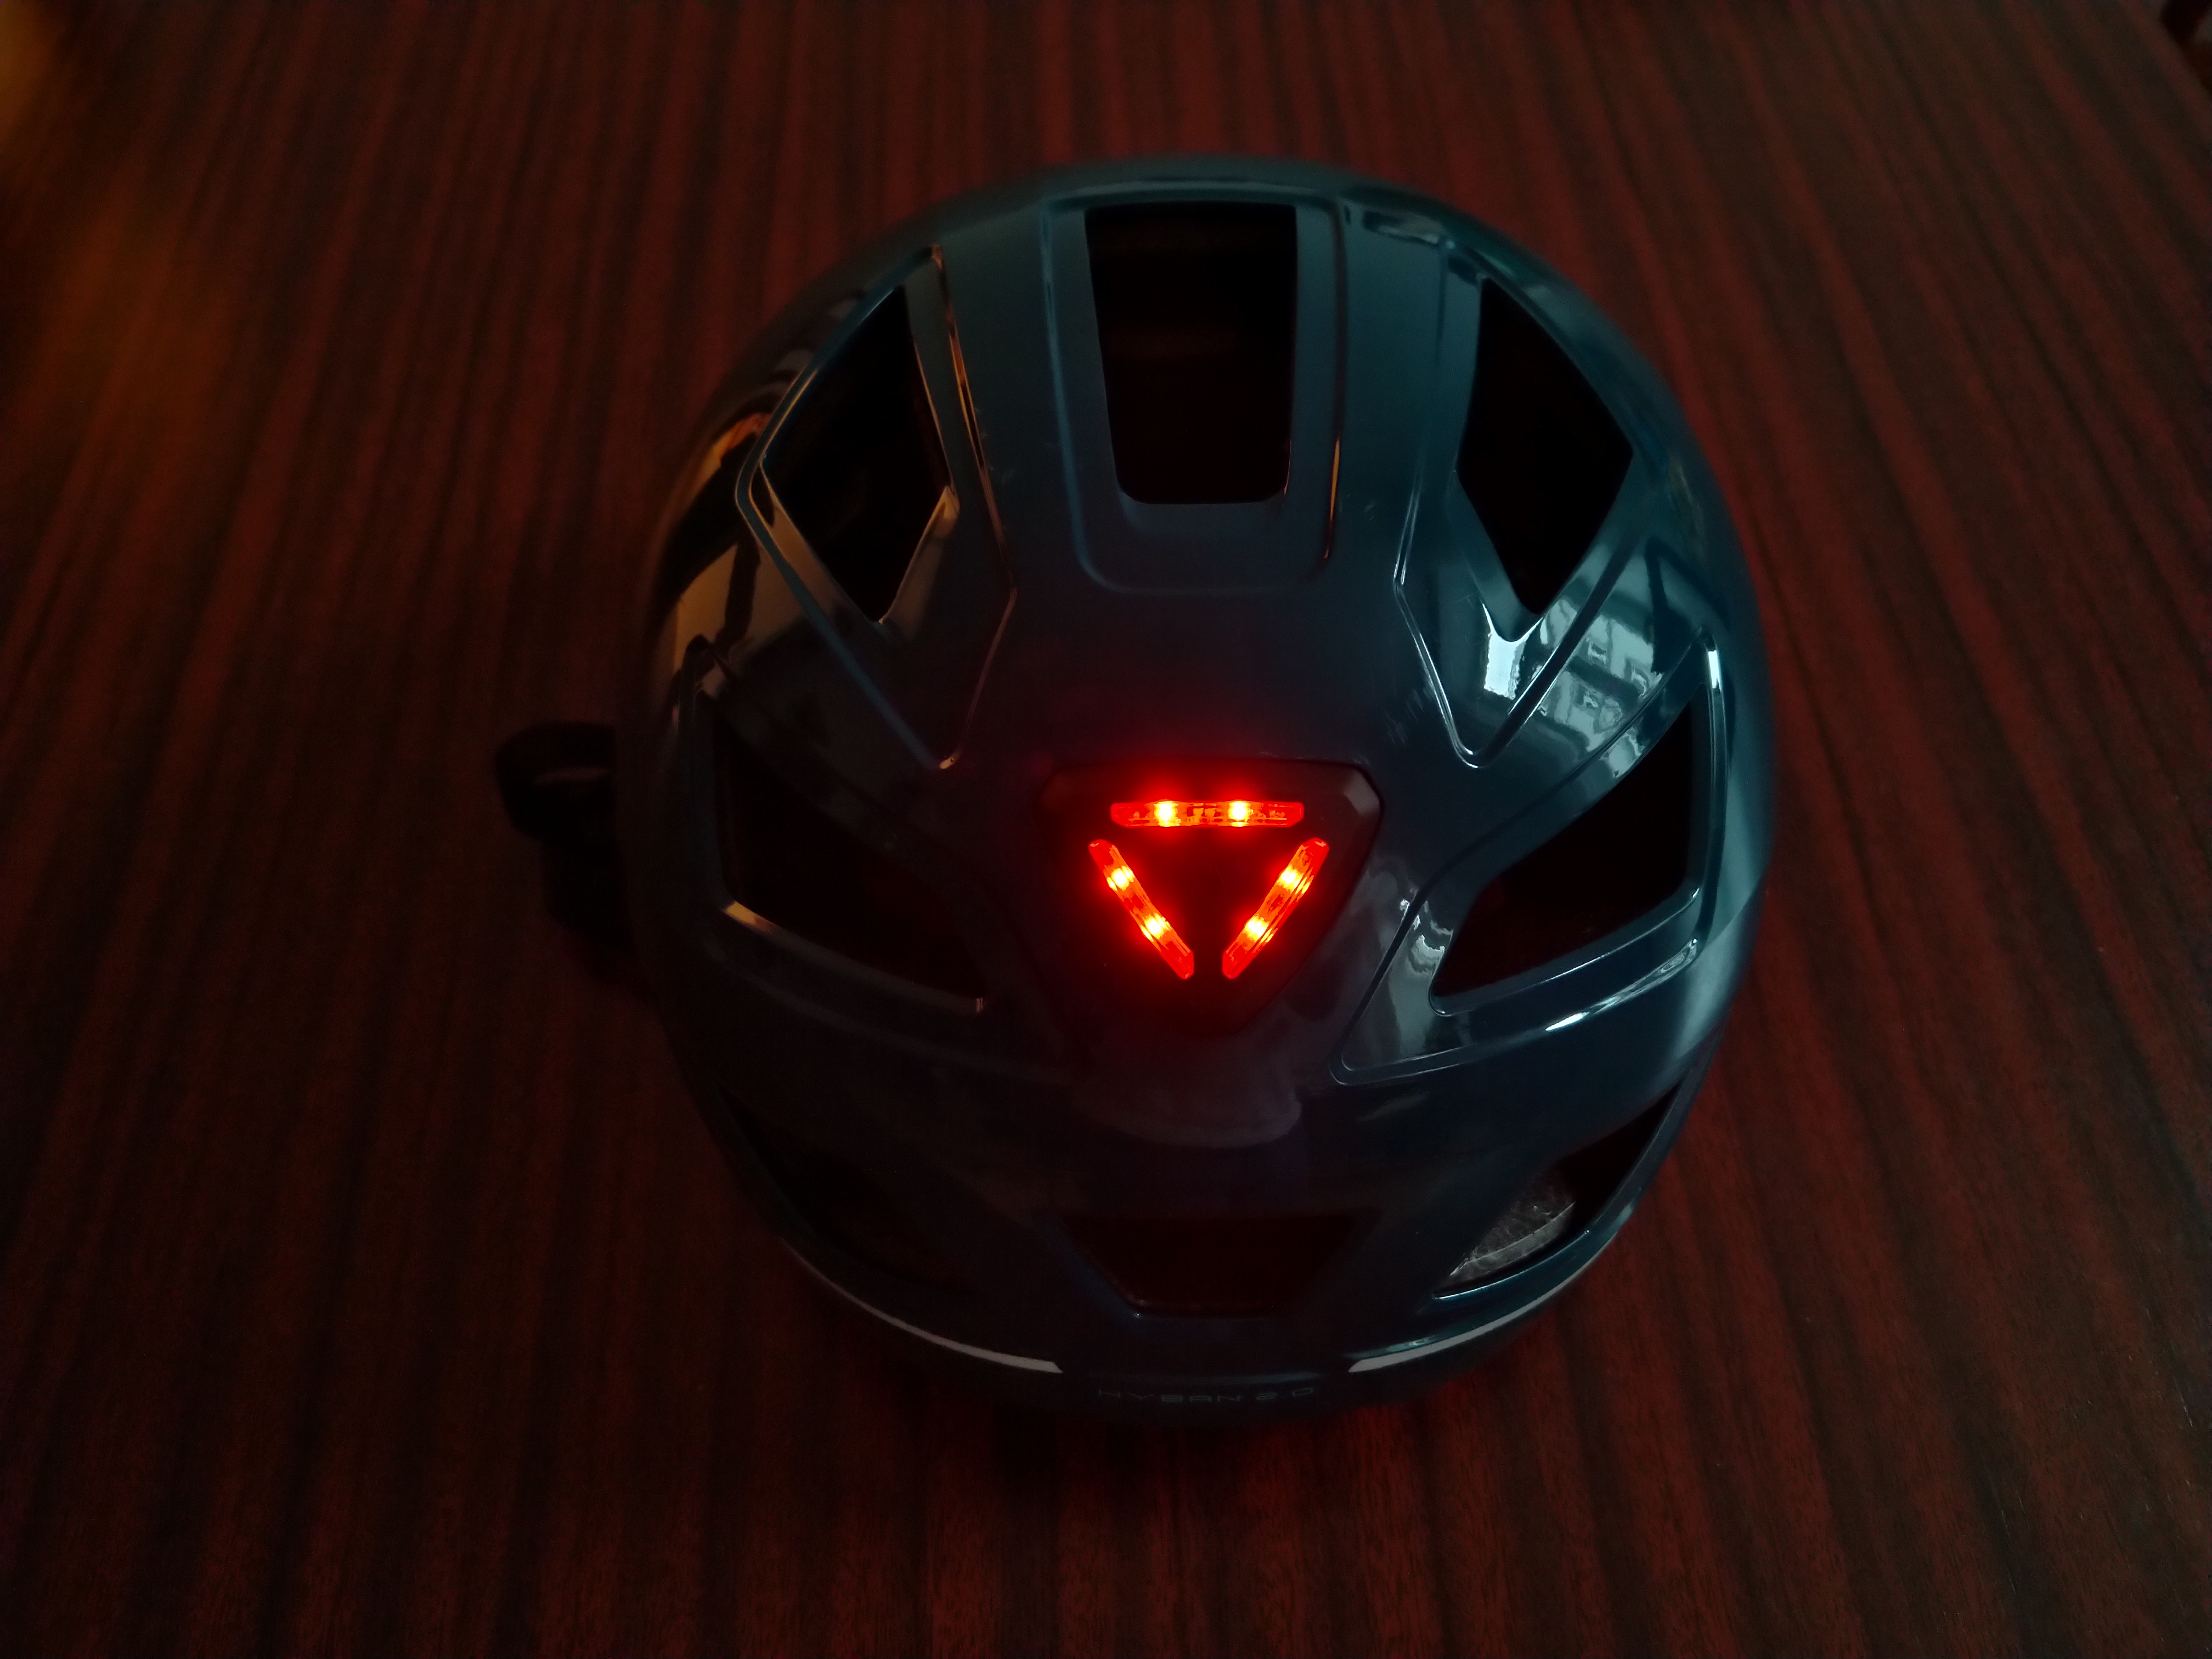
Last year I got a new helmet to make cycling for myself a bit safer. The helmet is an ABUS Hyban 2.0 in a stylish color with an integrated LED backlight, which helps others see me at night. Unfortunately the original light is powered by a single CR2032 coin cell, which not only limits its runtime severely, but also is not rechargeable. There even is a video on how to change the coin cell. This itself is just how ABUS makes products, but what really dumbfounded me were the misaligned LEDs. They just light straight into the rubber part of the light and only some scattered light can be seen from outside. Interestingly enough, the light made it to version 6 as the photo below shows "ACHV_V06".Long story short: I made a rechargeable drop in replacement for the original light.
If you're interested in this project, take a look at the github or the Tindie page to buy one, or just write a message or leave a comment.
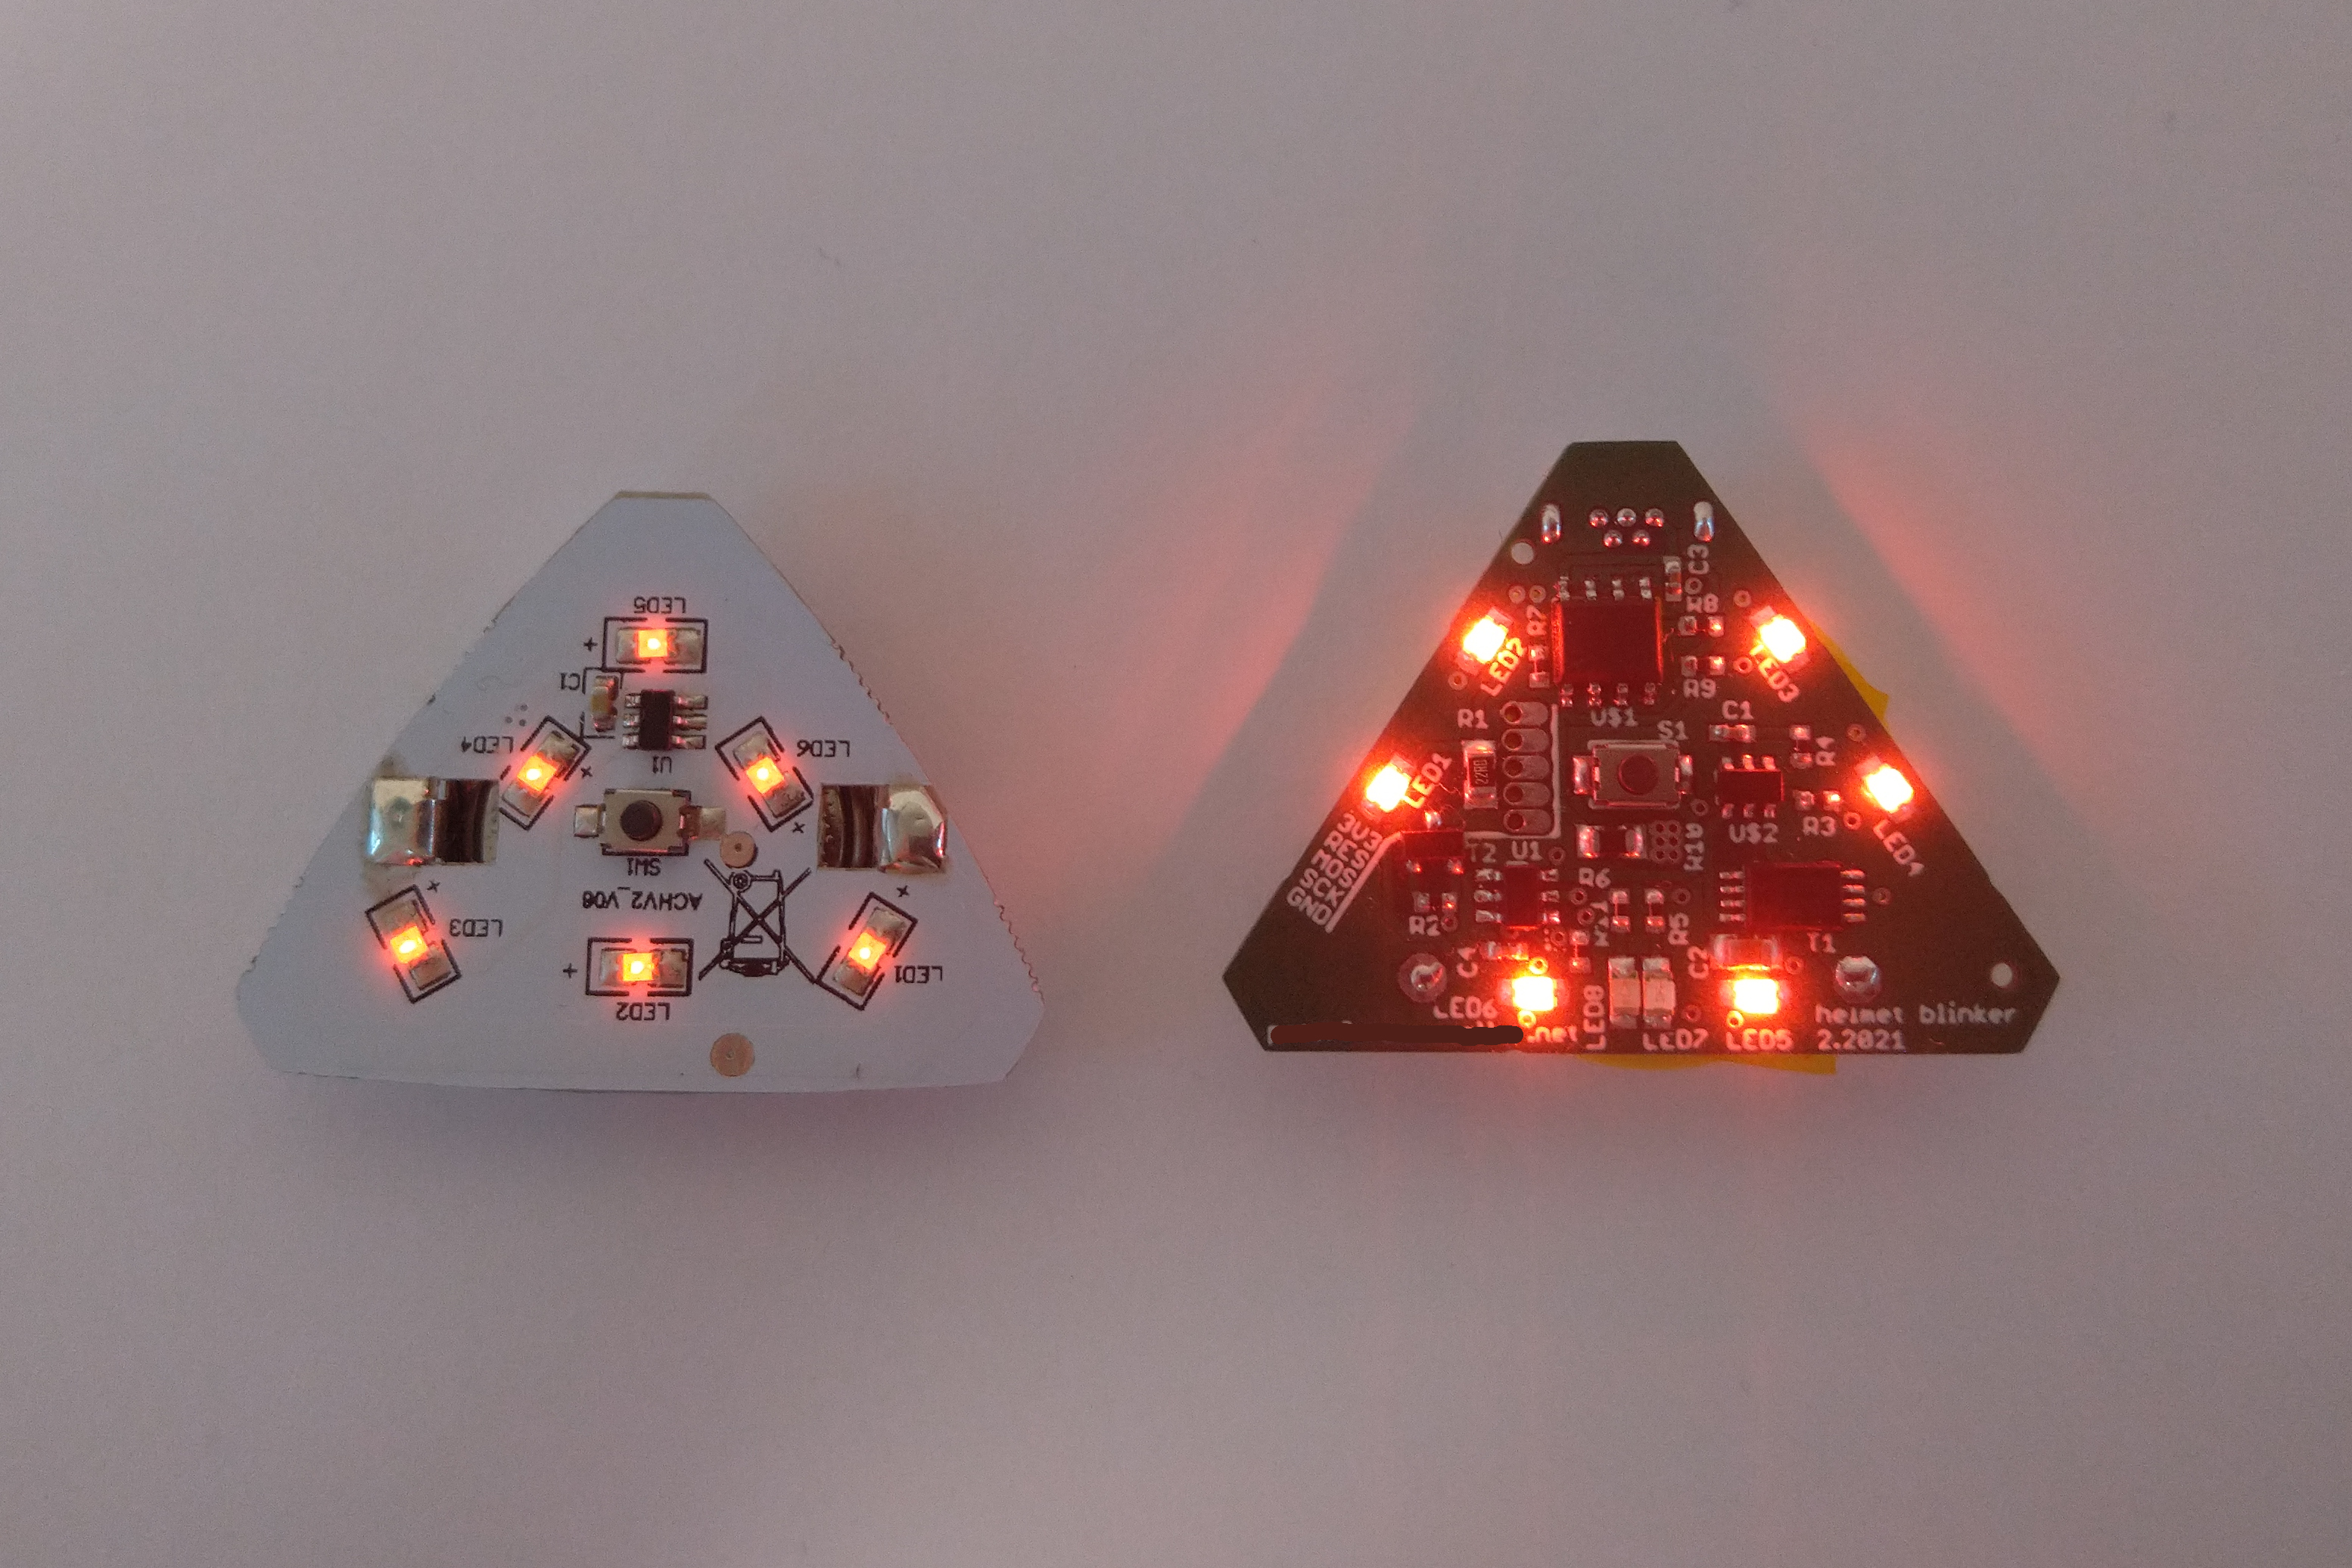
The original light on the left, the new one on the right.
Schematics
There probably is a reason why the original light was not rechargeable and it's most certainly money. The most complex part for the PCB was the charging solution around the TP4056 IC. The LiPo is fully protected: over- and undervoltage, temperature limit and short circuit. There is not a lot that can go wrong anymore with the battery which is a reassuring since it is worn near your head.Besides this, the most interesting area is around the ATTiny10 microcontroller. It get programmed via a programming header which I made myself out of some pogo pins. It can detect the push button being pressed and then run some funky blinking on the six red LEDs.
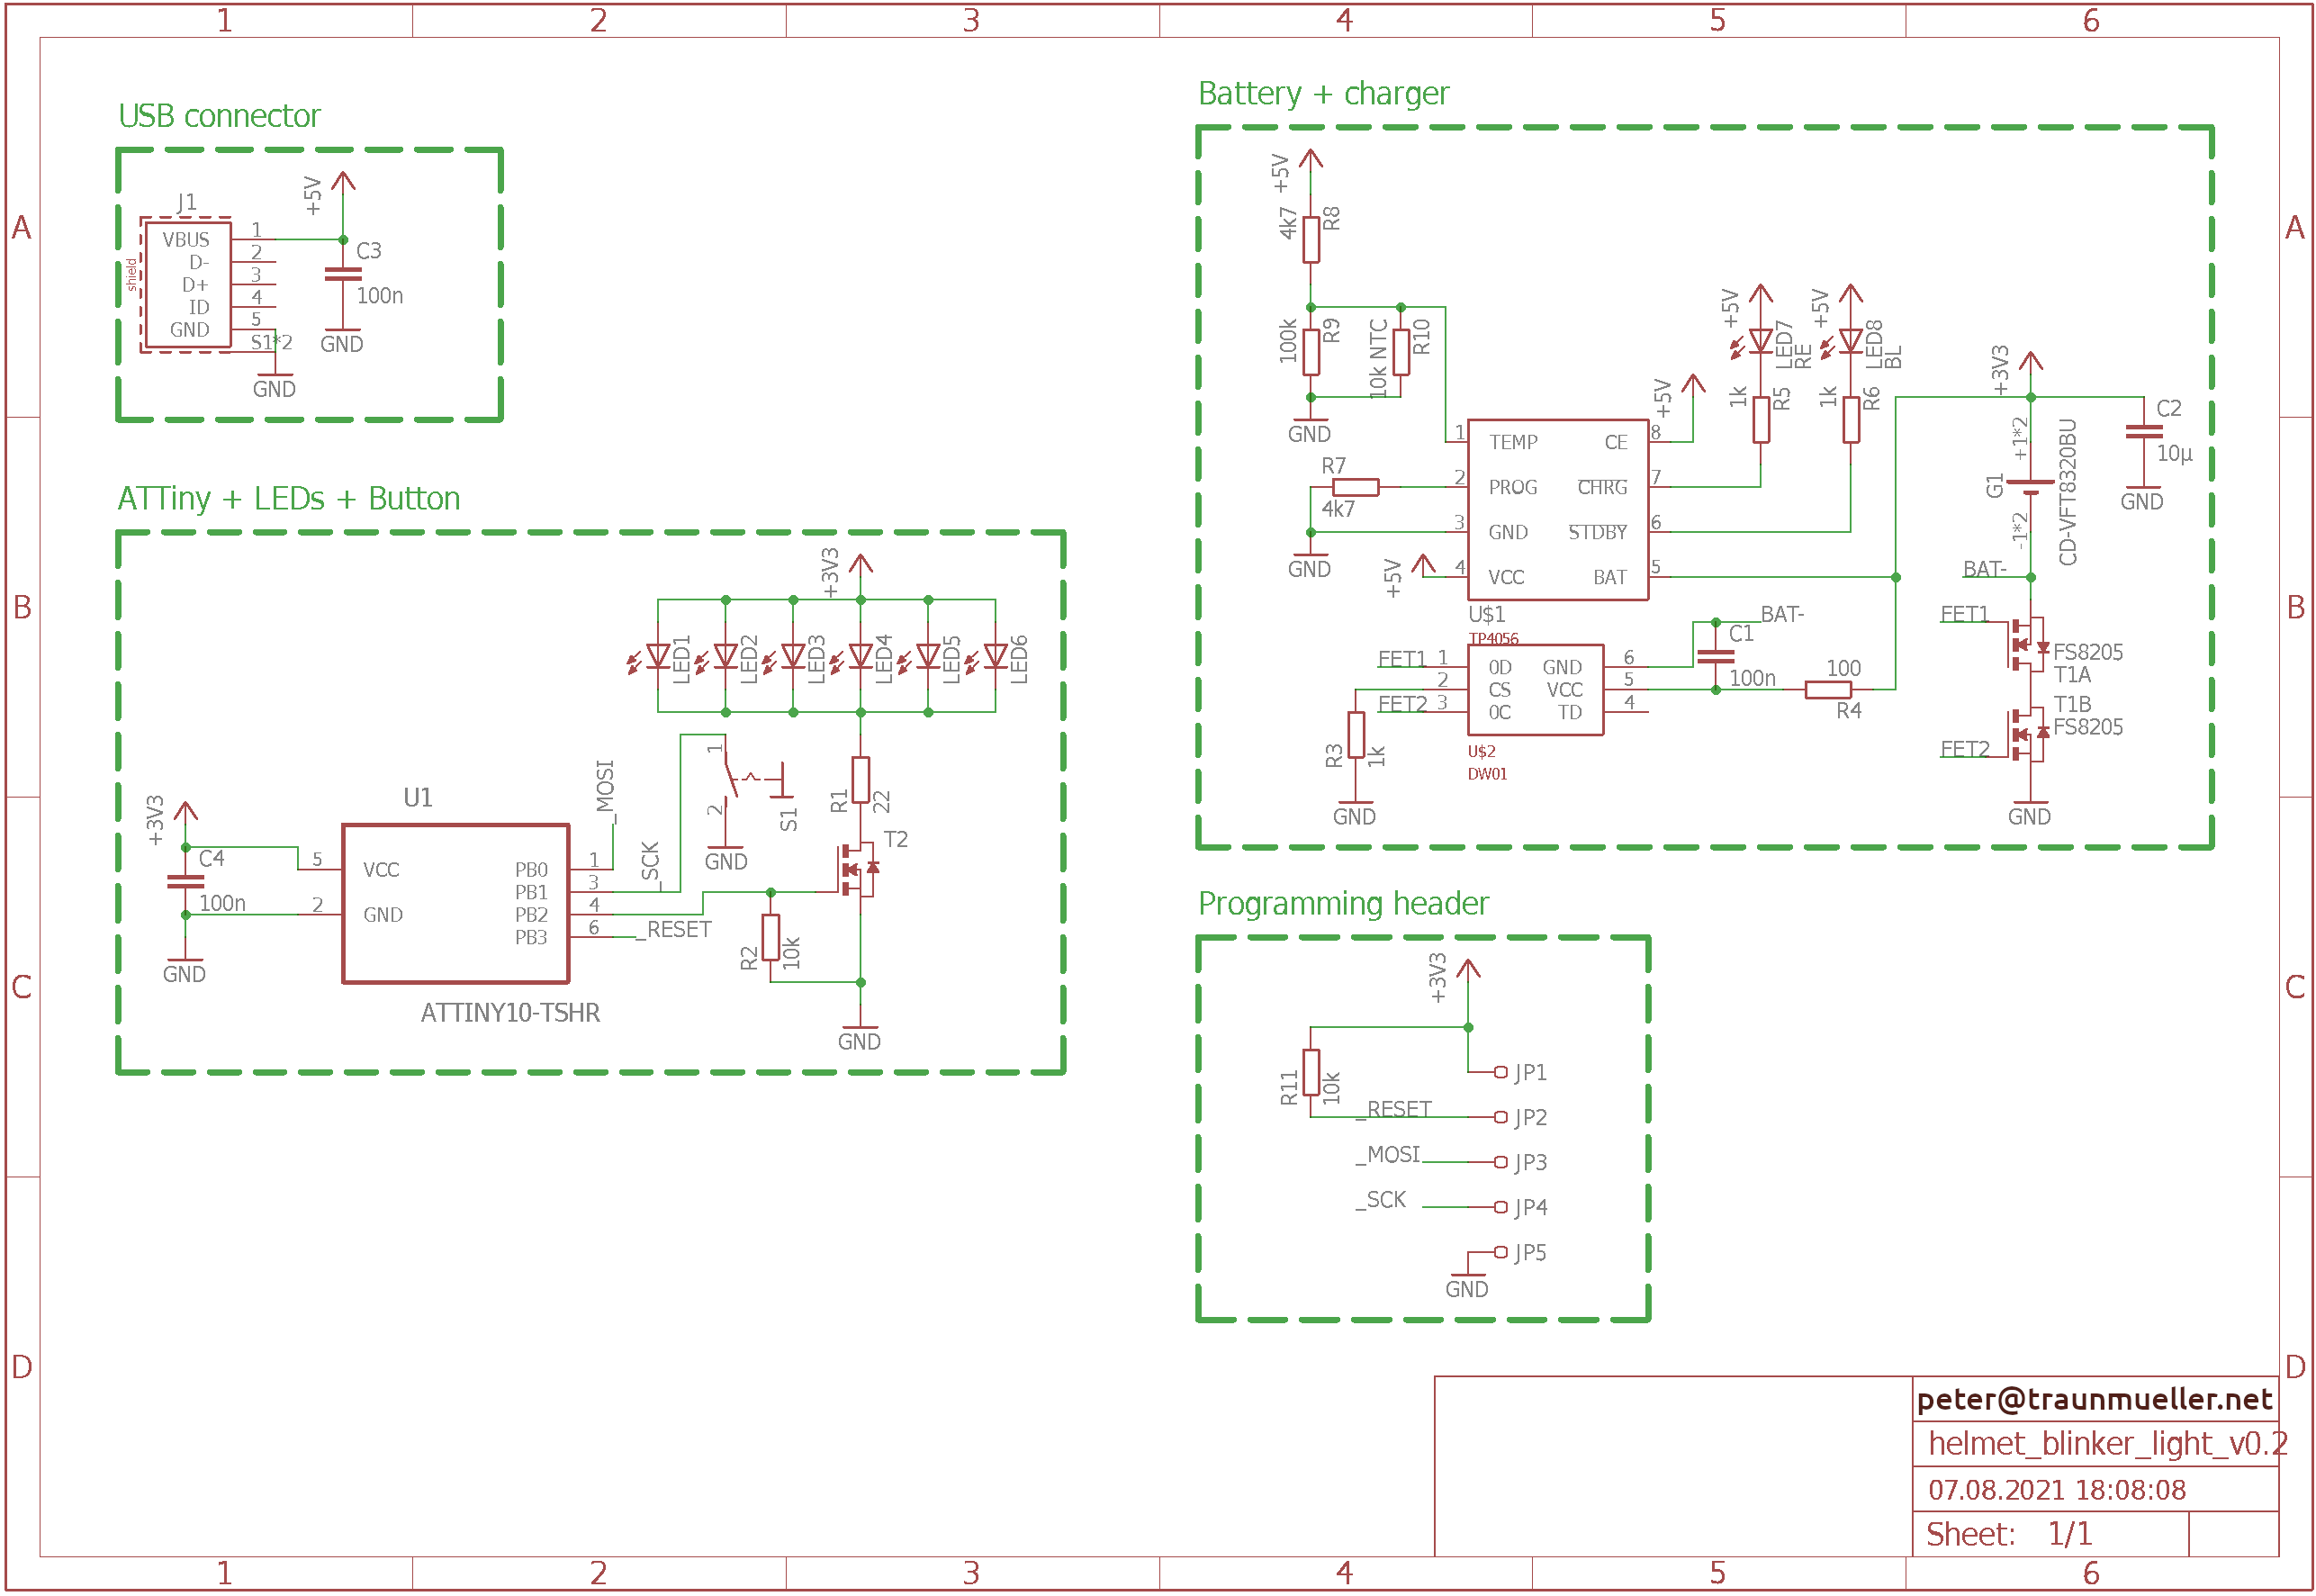
Schematics for v0.2.
Hardware
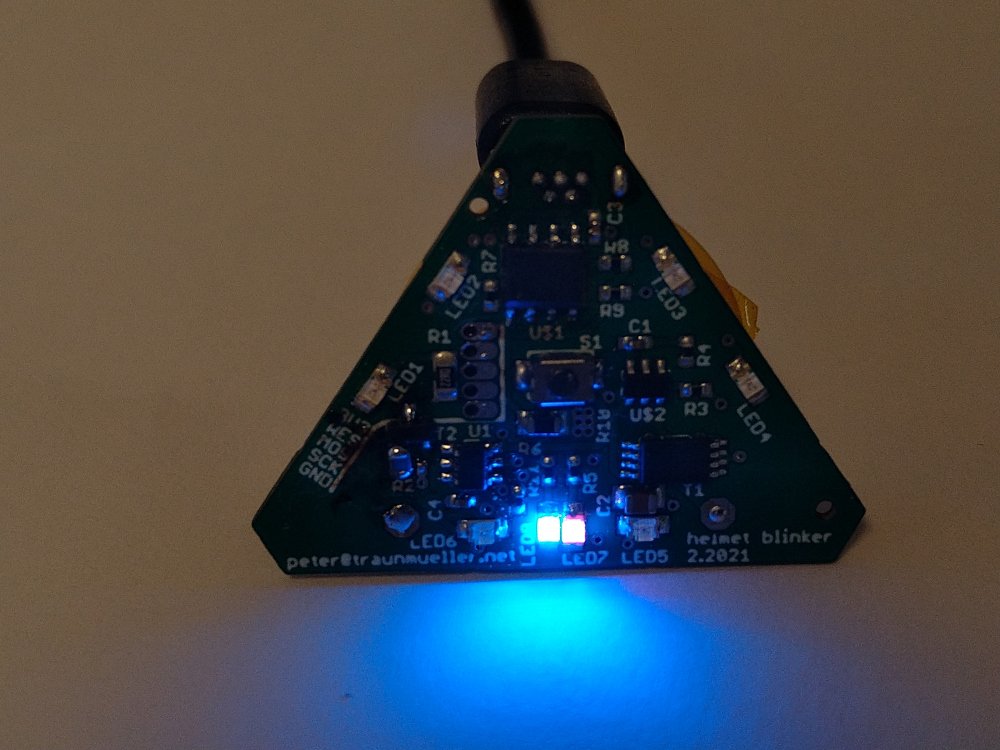
The hardware assembly was mostly done by jlcpcb (unfortunately not a sponsor). I only had to do the battery and USB connector. The connector itself is a 90° micro USB which snugs in perfectly next to the battery and rubber protector. A great amount of measuring wnet into the correct positioning of the 6 red LEDs bedind the plastic reflector. This worked out surplrisingly well as the can be individually seen in the top photo.
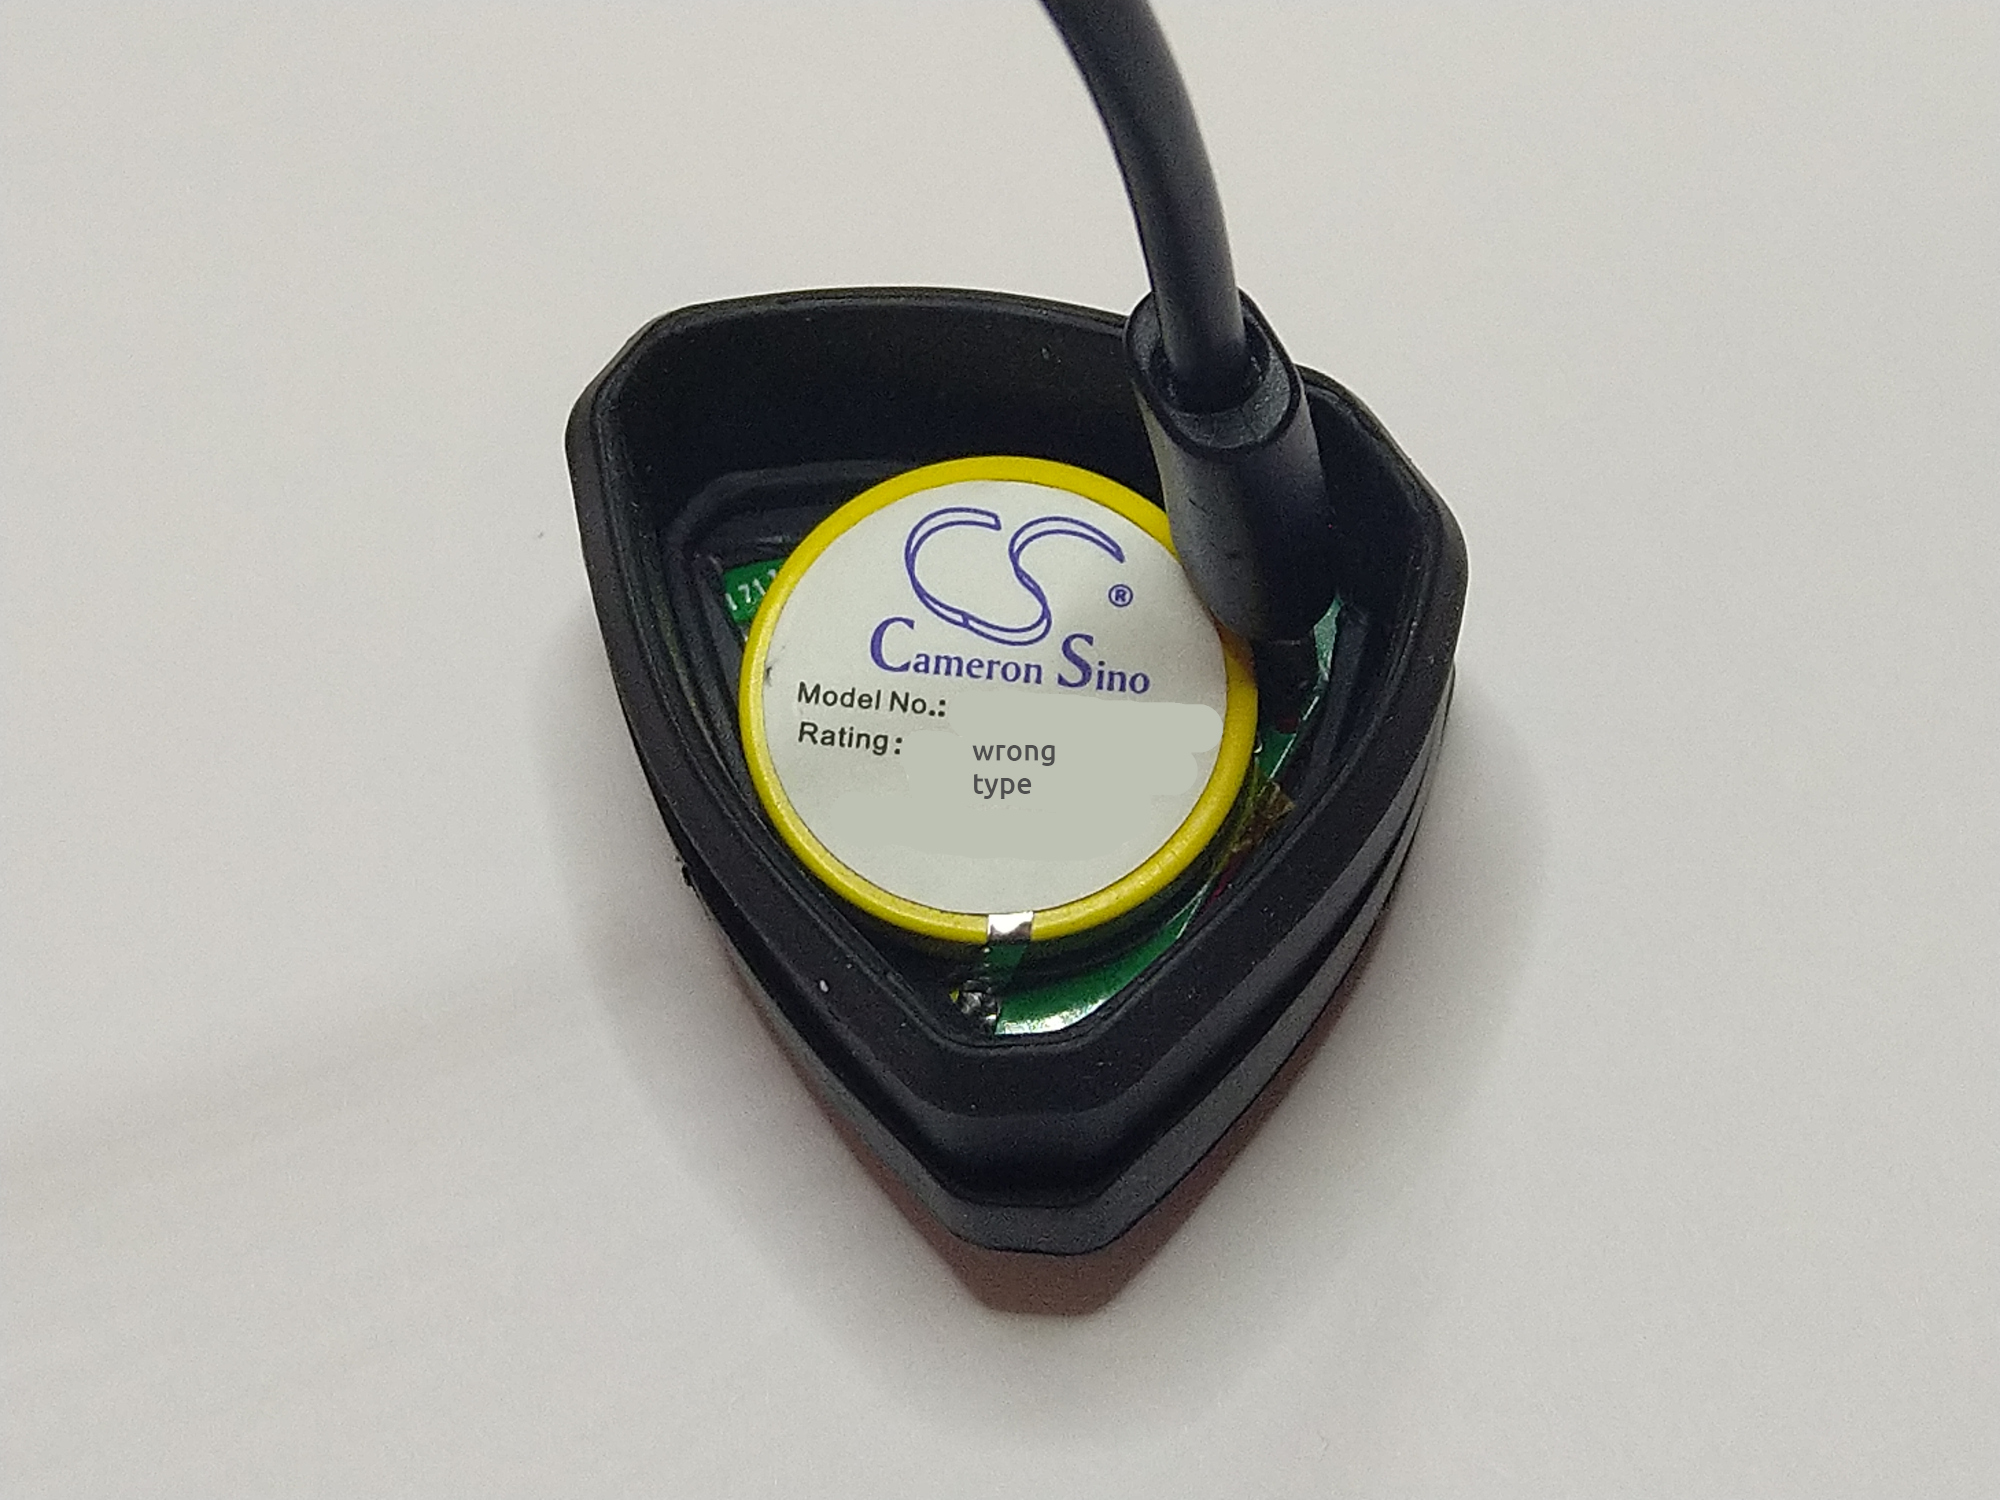
Backside of the light while charging
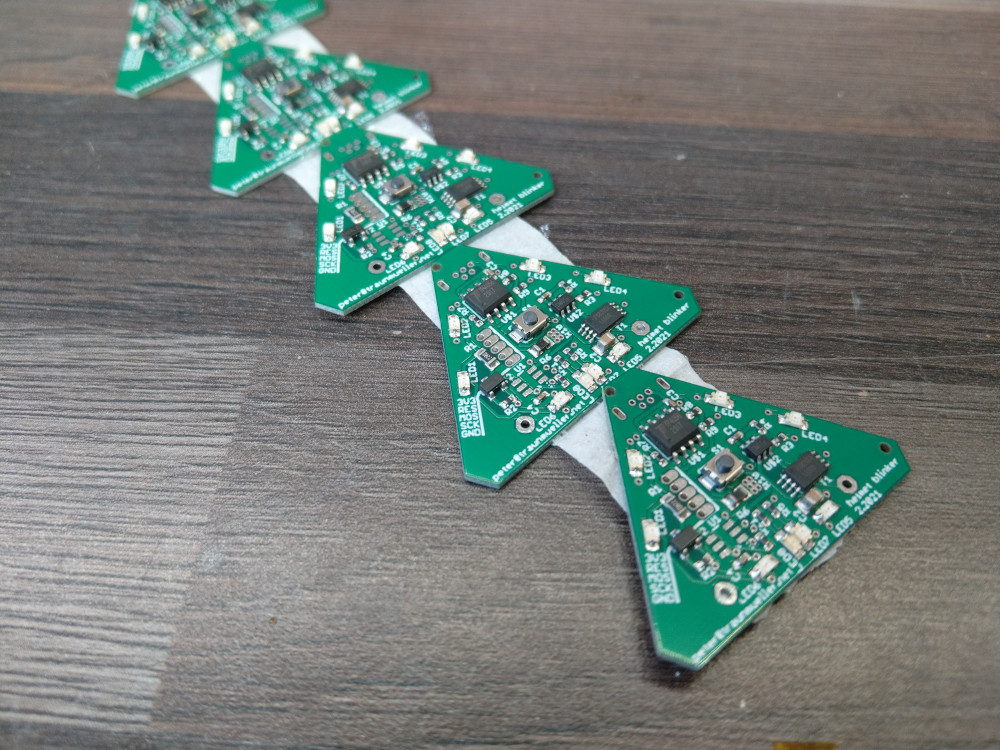
PCBs to make more lights.
Charging indicators for the LiPo cell.
Software
Programming an ATTiny10 was more challenging than expected. Although it is an Atmel microcontroller out of the AT* family it behaves quite differently than the ATTiny 84 or 85 for example. It does not feature a real ICSP programming input and can therefore not just be programmed with the Arduino IDE and a library. The programming protocol is called TPI (Tiny Programming Interface) and luckily technoblogy already worked that one out, big thanks to them! It only took me almost a week to find their solution and order the recommended "USBasp" programmer, so use this information wisely. After that is is quite straight forward, a lot of low level register magic combined with the incredibly low power deep sleep of the tiny. There are 4 different modes which are cycled through by pressing the button:
- 1: 100% on
- 2: 50% on, 500ms period
- 3: 20% on, 300ms period
- 4: 3% on, 1000ms period
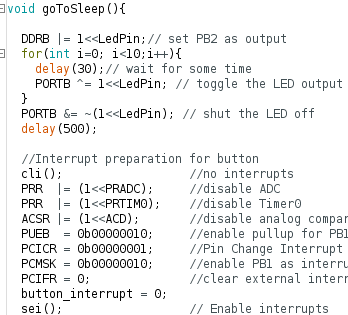
Screenshow of the code: source .
Runtime
The most important question was the possible runtime of the setup. The battery used is a 3.6V 120mAh LiPo which drives the 6 LEDs at ~10mA each, the ATTiny draws 0.2mA while running. This means that in mode 1 it can do roughly 2h on a single charge. In mode 4, this runtime goes up to 65h, since it is only pulsing the LEDs.
Standby time can be calculated with the deep sleep current of the ATTiny of <0.1µA. This would result in 1.5 million hours standy time.. More realistically the rest of the circuit uses more current and limits this time. It still is an impressive number and will definitely be the clickbait in case I make a video about this.