Optical character recognition with tesseract on a raspberry pi
by QC
Posted on Fri, March 26, 2021 - 11:56:54 AM
3D Print Raspberry Pi OCR Tesseract
Motivation
How do you track people coming and going into rooms during Covid19? Right, you save the RFID tag off their ID card! Thing is, not all IDs have RFID and more so, not all of the tag IDs are easily matched to user IDs.. To get around this we can just take a photo and read off any number we want. That's easy and quickly modifiable for different ID cards.
Long story short: The project uses tesseract to do optical character recognition (OCR) on a photo taken from the ID card. This is then fed into a server which saves the original picture with the read number.
If you're interested in this project, take a look at the github repository or just write a message or leave a comment.

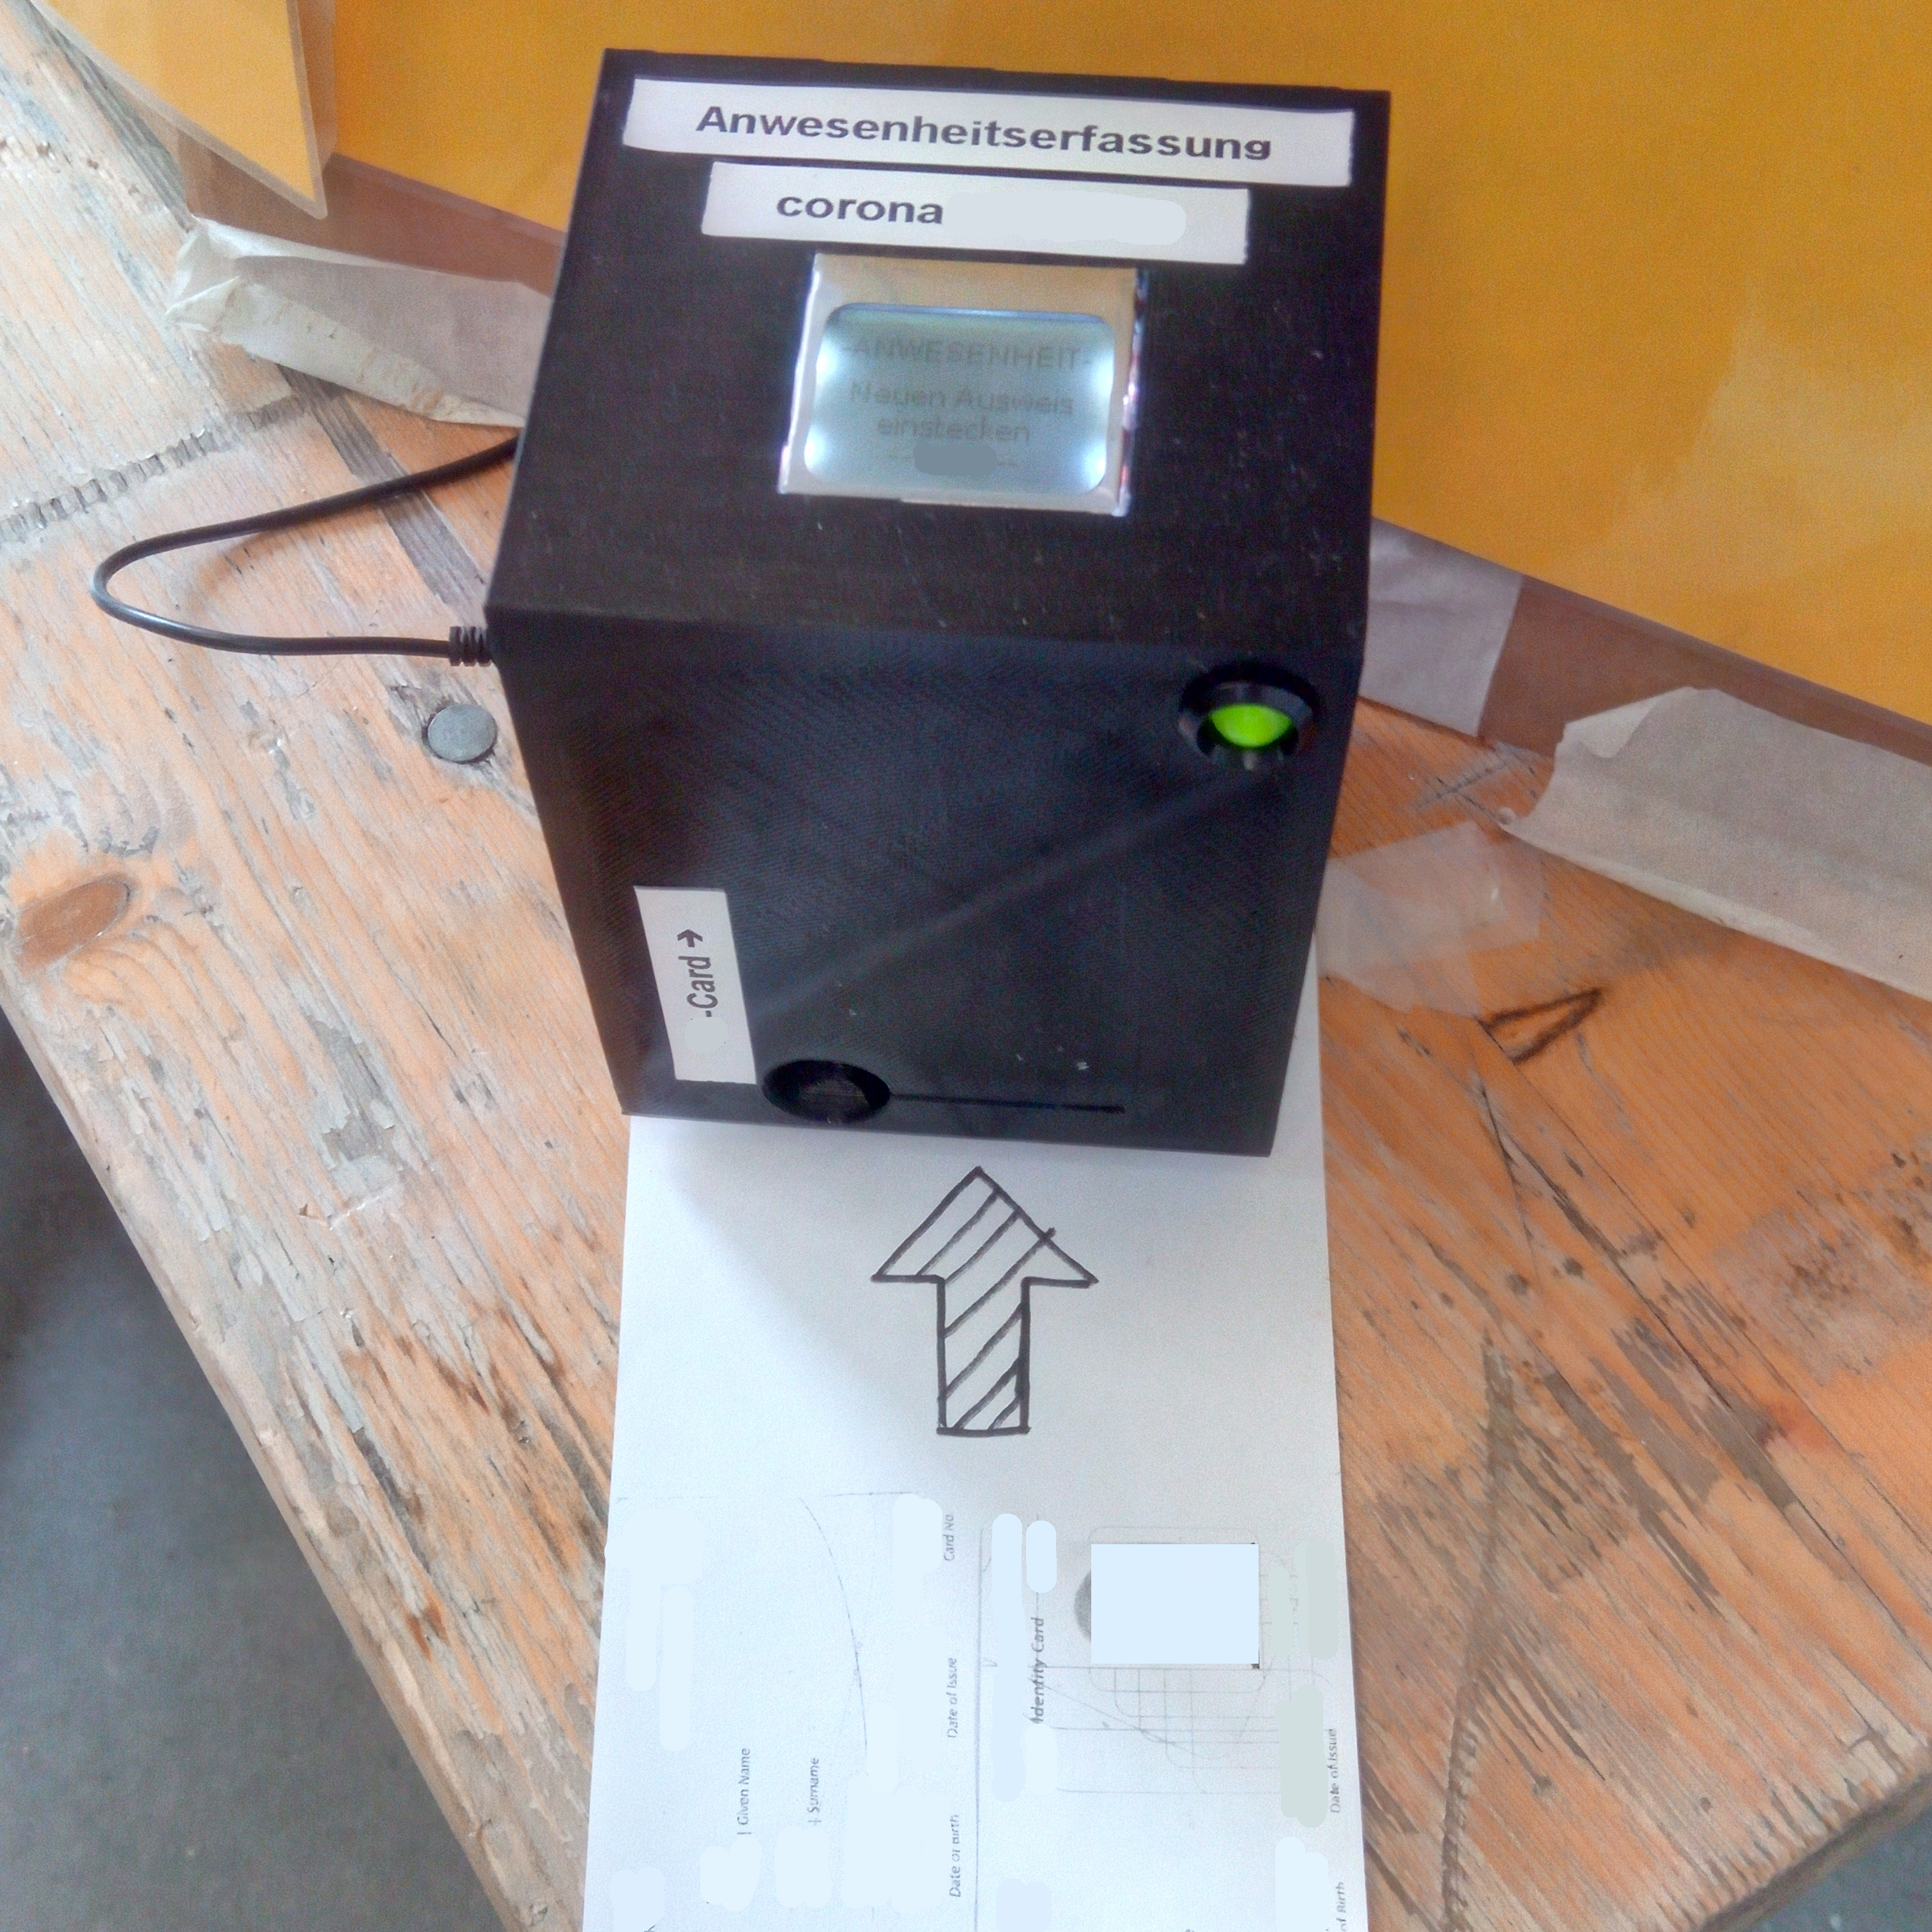
Photo of the reader in action.
Hardware
The stuff you have to buy is quite straight forward:
- Raspberry Pi zero with SD card
- Raspberry Pi cam
- Display Nokia 5110 / PCD8544
- 2x LED white
- 1x LED greed/red
- 3x 220 Ohm resistors
- 2.5mm DC barrel connector
- Some wires and heatshrink tube
- 4x M3x12 screws
I'm not including part numbers as most of the stuff was bought from ebay and can be found by posting the description in the searchbar will find the cheapest option.
3D printed hardware
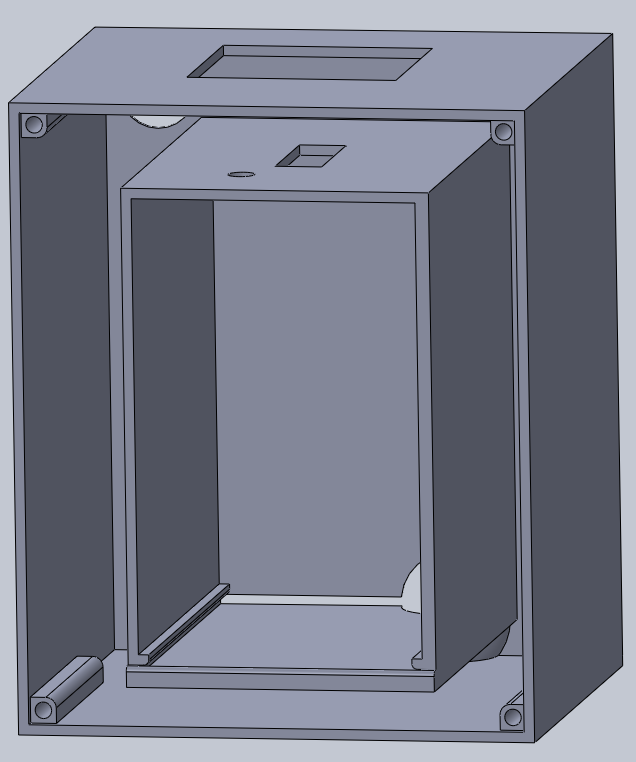
The case is made out of two 3D printed parts. They are optimized to use as little filament as possible and don't need any support while printing.
If you take a look at the rendering, you can see that the case is mostly empty. The inner chamber is on the top equipped with the camera and one or two LEDs and on the bottom the ID card can slide in from the front. This ensures that the camera always has the same perspective and reading stuff off the picture is straight forward. Around the inner chamber I've left enough space to fit in all the electronics and wires. The final design has two sand filled bags on each side to weigh everything down. Otherwise the box gets shifted around while inserting the ID and feels quite flimsy.
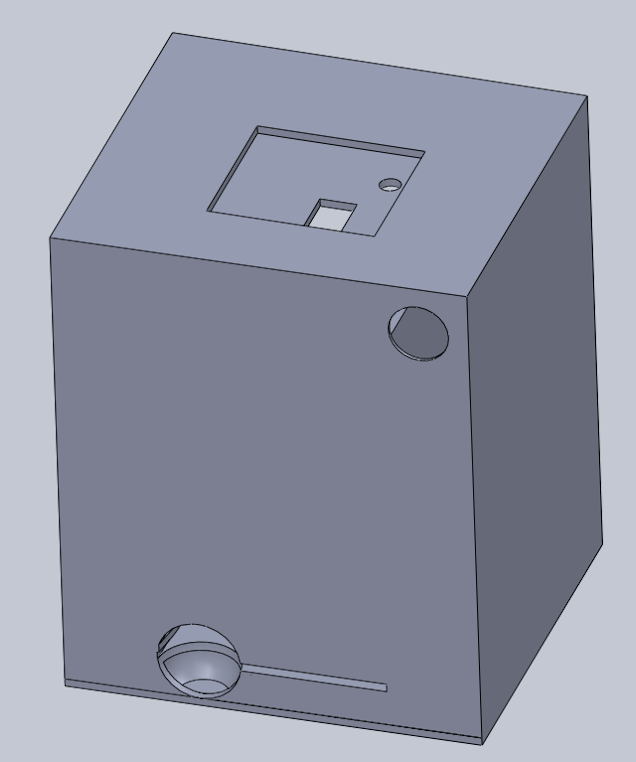
Rendering of the main 3D printed part.
Electronics
The reader was designed to use as little electronics as possible. This reflects in not using an eject mechanism or endswitch for card detection. It has an old Nokia 5110 Display which is super cheap on ebay and a two colour LED for user feedback. There are no buttons or any option for the user to interact with the unit, besides pushing in an ID. The schematics are below, note that the two white LEDs are just for illumination purposes.
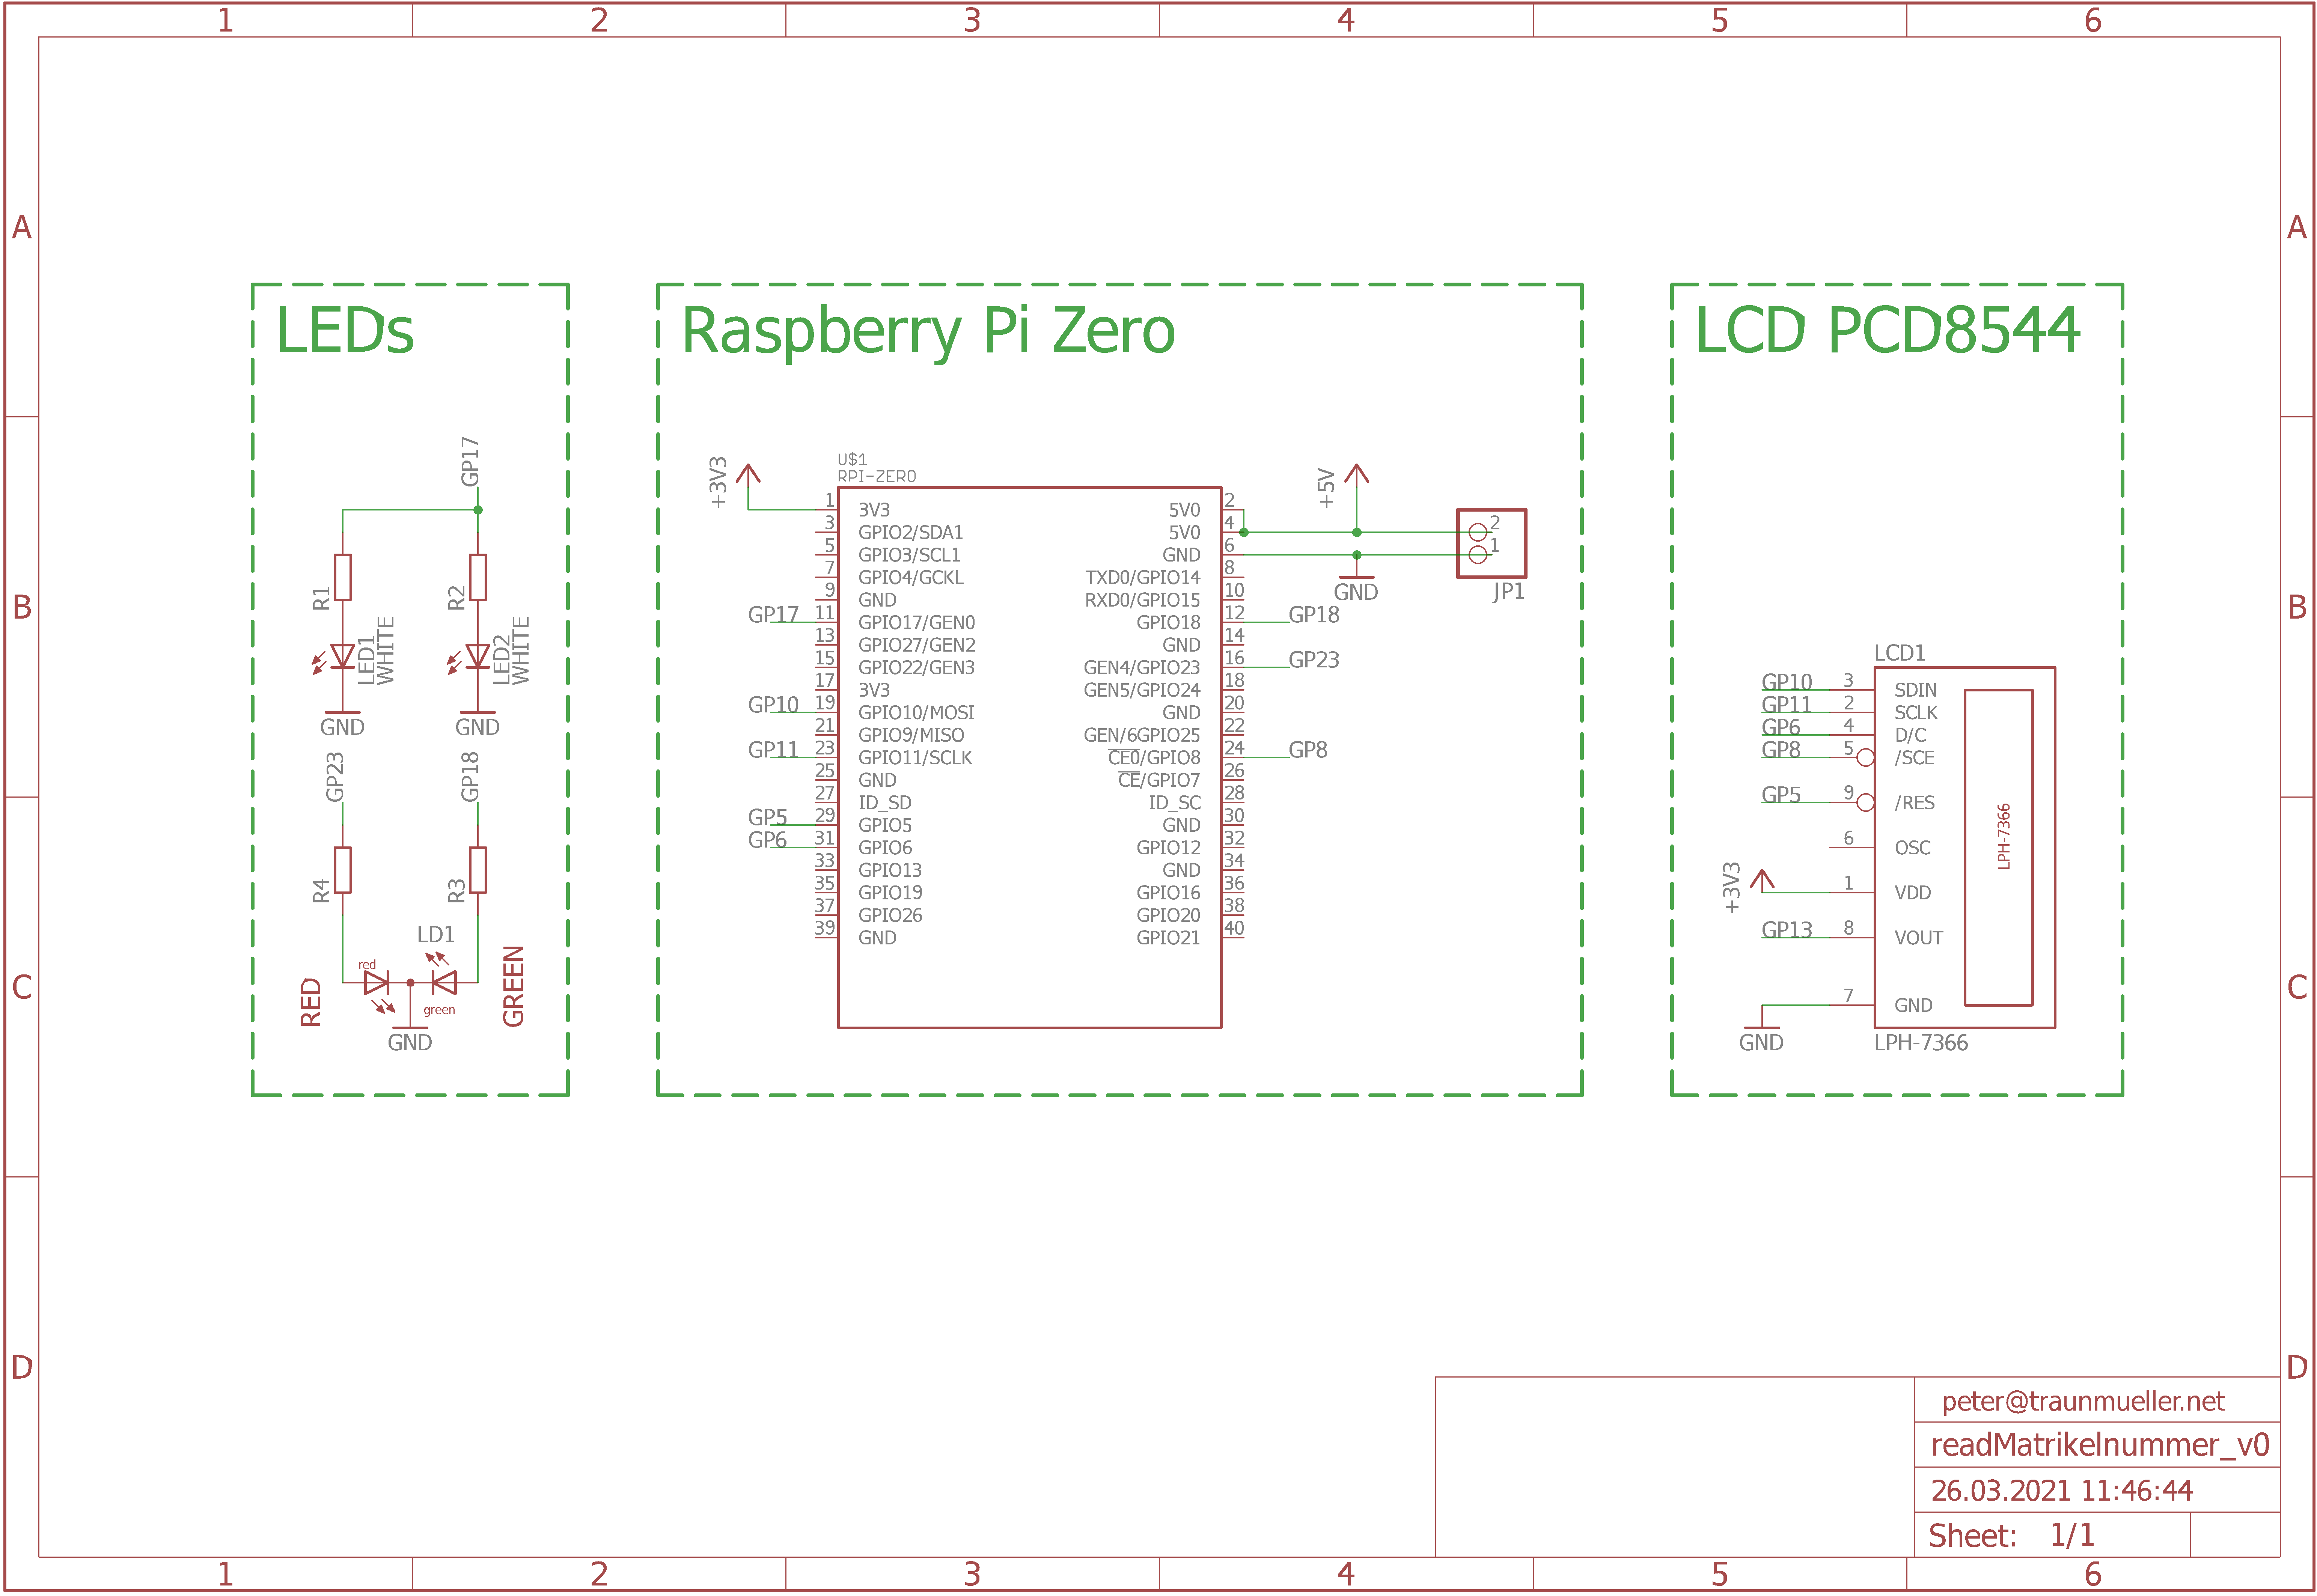
Schematics.
Software
Obviously all the code is written in python. Actually it's not that obvious, but there is a nice library doing most of the tesseract interaction for me, so that's that. Please note that the guide includes training data. I've trained the tesseract according to some tutorial and would not recommend you doing so unless you have a good set to start with. I've done training with a limited set of a few cards and it actually made the OCR worse. To get everything running, you can work your way down this list:
- set up the RPi
- > sudo apt get update && upgrade
- > sudo apt-get install tesseract-ocr
- > sudo apt-get install python3-pip
- > sudo pip3 install pytesseract
- > sudo pip3 install picamera
- > sudo pip3 install adafruit-circuitpython-pcd8544
- > sudo apt-get install ttf-dejavu
- > sudo apt-get install python3-pil
- optionally, if you have training data: > sudo cp /home/pi/tesseract_training/tesstrain/data/USERcard.traineddata /usr/share/tesseract-ocr/4.00/tessdata/
Before you can start, you need to enable SPI, SSH and the camera in the Interface options of:
> sudo raspi-config
To run the code, start it with start_readMatrikelnummer.sh from the github.
It continuously takes photos of the chamber and compared the right most edge brightness to a set value. If this gets bright enough, it takes a photo. This is shown by blinking the red/green LEDs and the photo is saved. After the Photo is taken, the display tells you to take out the card and stops the blinking. Parallel to that it cuts out the part of the image where the interesting number could be and does an OCR on that. If it doesn't detect a plausible number, it takes a second part of the image and does the OCR there. This routine can be expanded infinitely for different cards with different positions for the numbers. If it at some point detects a valid number it opens a URL to upload the number and corresponding image to a server via PHP.
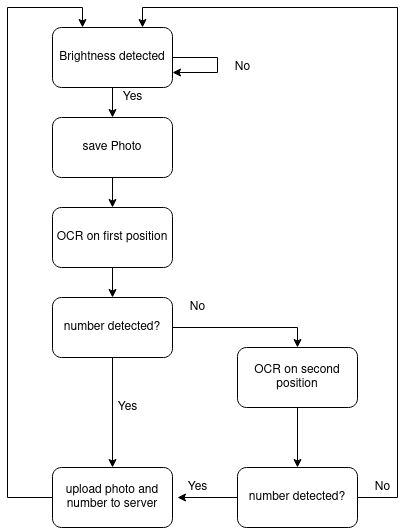
Flowchart for the code.
Server
If a plausible input is detected, the image and number get uploaded to a server via PHP. The server side is really low level and doesn't need a database or any other thing besides PHP. It checks all the uploaded items for their creation date everythime someone opens the page and deletes everything that is older than 14days.
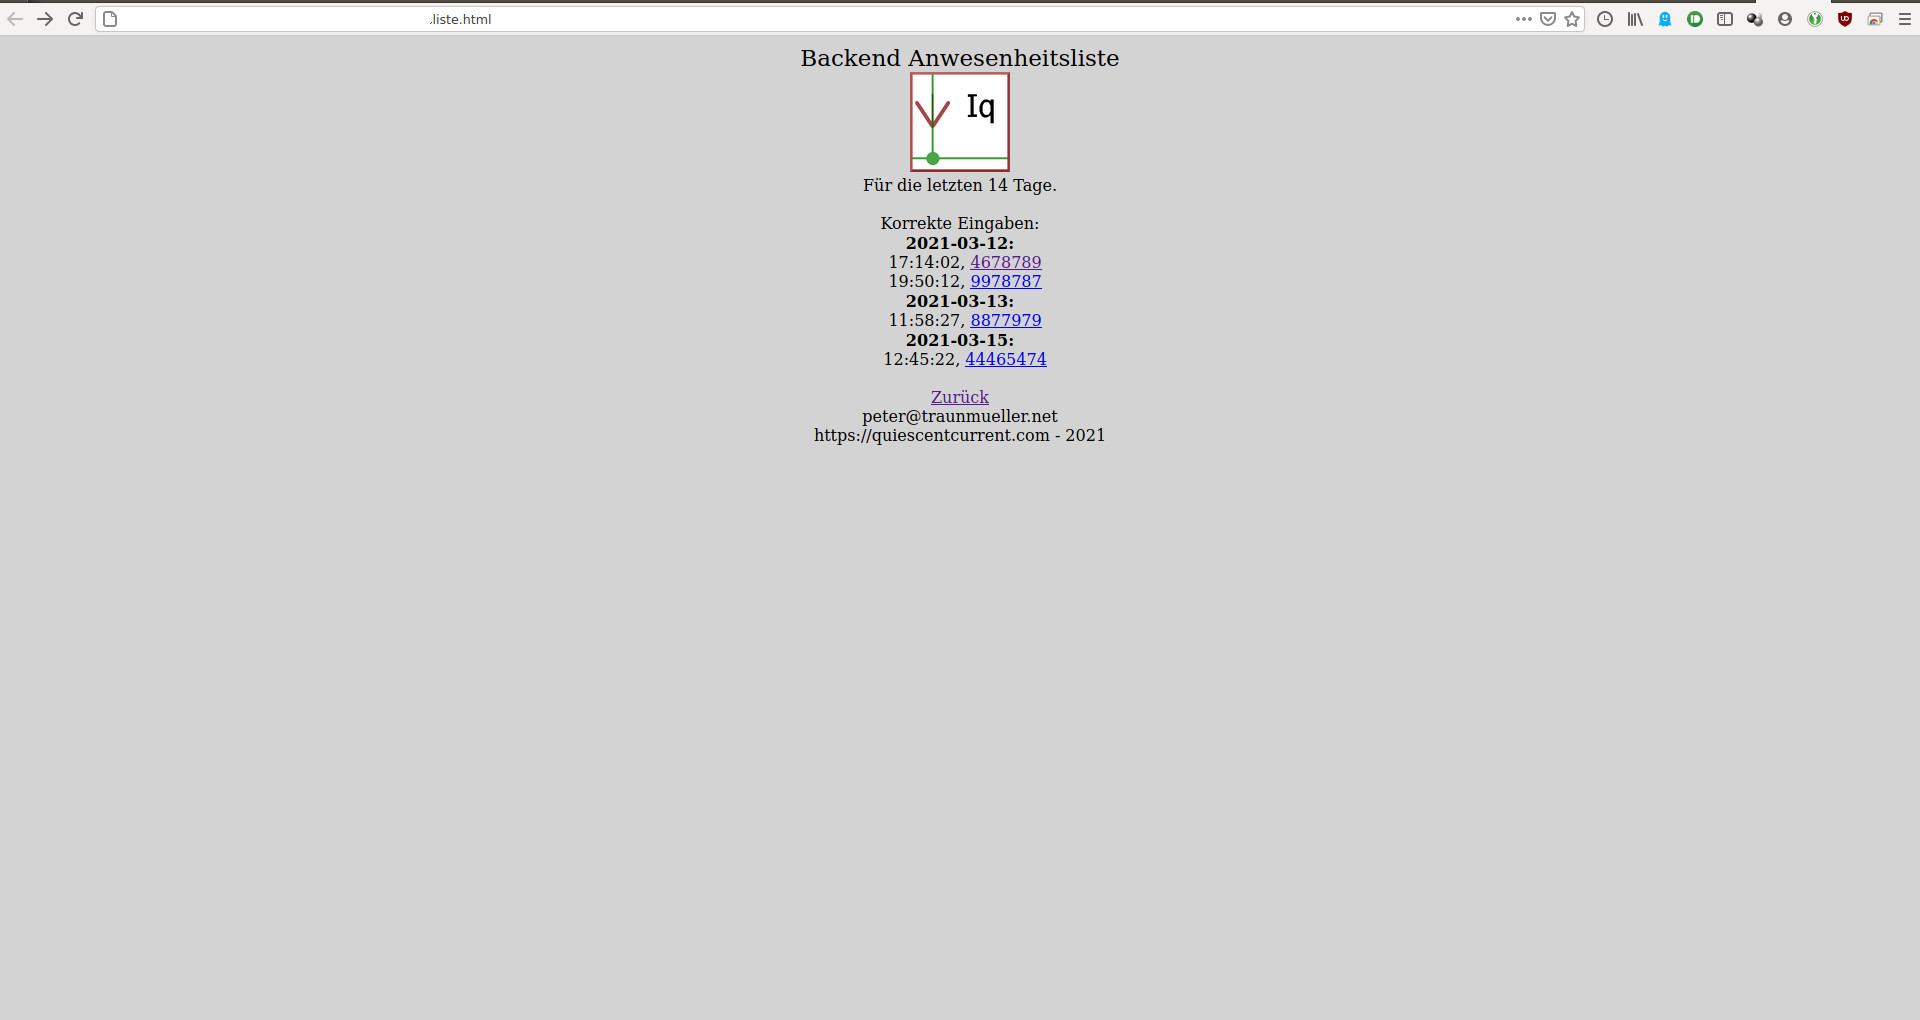
Backend on the server.
Assembly
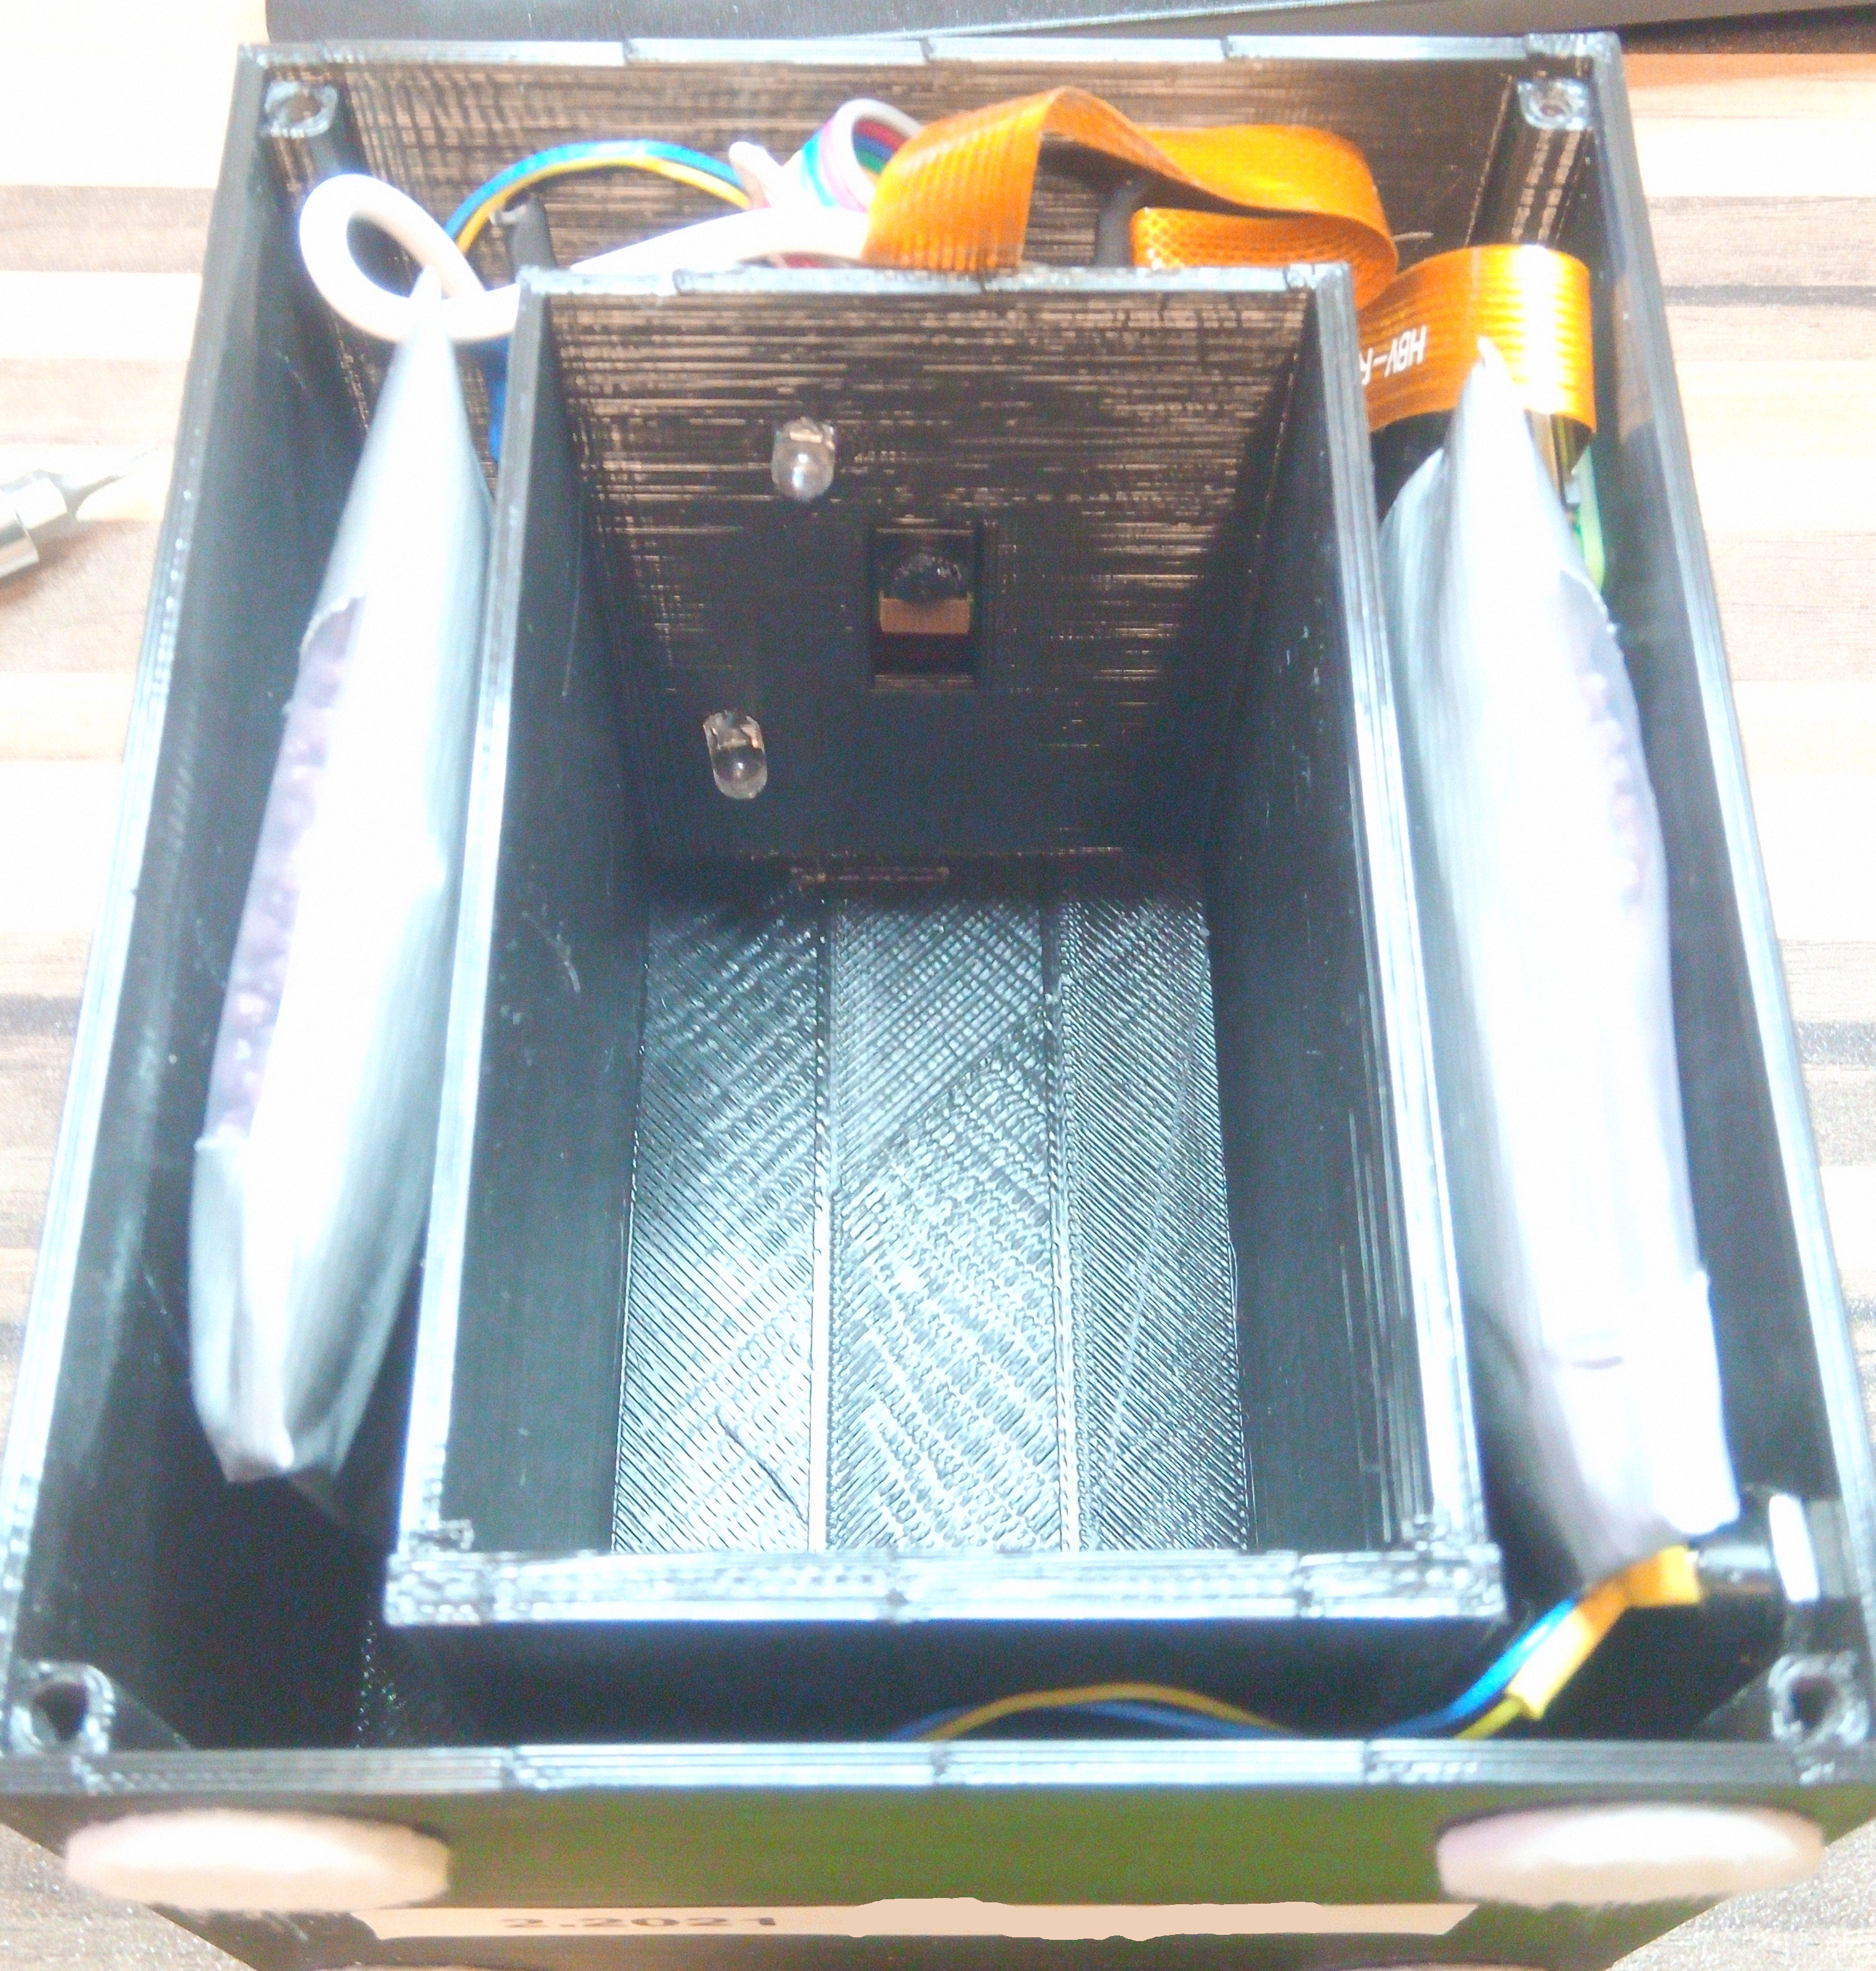
Bringing everything together is not difficult and only requires some hot glue. Due to the spacious inner part of the box, all the cables and the pi perfectly fit with still some space left.

Half assembled unit.
The additional space is then filled with two sand filled bags to make the unit heavier and give it a more robust feeling.
Unit with sand bags in place.