RAID6 on an iSCSI - Raspberry Pi
by QC
Posted on Fri, October 09, 2020 - 06:36:09 PM
iSCSI Raspberry Pi RAID6
Motivation
How doesn't want a huge RAID in their living room? Lots of people certainly do and getting a NAS at a fair price is often complicated. This one time at band camp... no. We're here to get to know how I had to unfuck a Raspberry Pi 4 after getting it stuck at boot after enabling iSCSI auto start. But let's start at the beginning.
Intro
While hosting a bunch of stuff, the word backup is thrown around quite often. Every tutorial I've read includes something on the top consisting of backup all your data before starting or alike. The professional admin I am, I never did, and had to fiddle around a lot to get stuff working again. This led me to the point where I bought a desktop RAID1 to backup the most important stuff at home. As it has to be, those two poor drives got used a lot and soon turned out to be too small. During this time I also developed some motivation for real backups and told myself that the next system I'm going to buy would need to be a RAID6. As those things are not cheap in any way it took me a while to find a promising candidate.Hardware
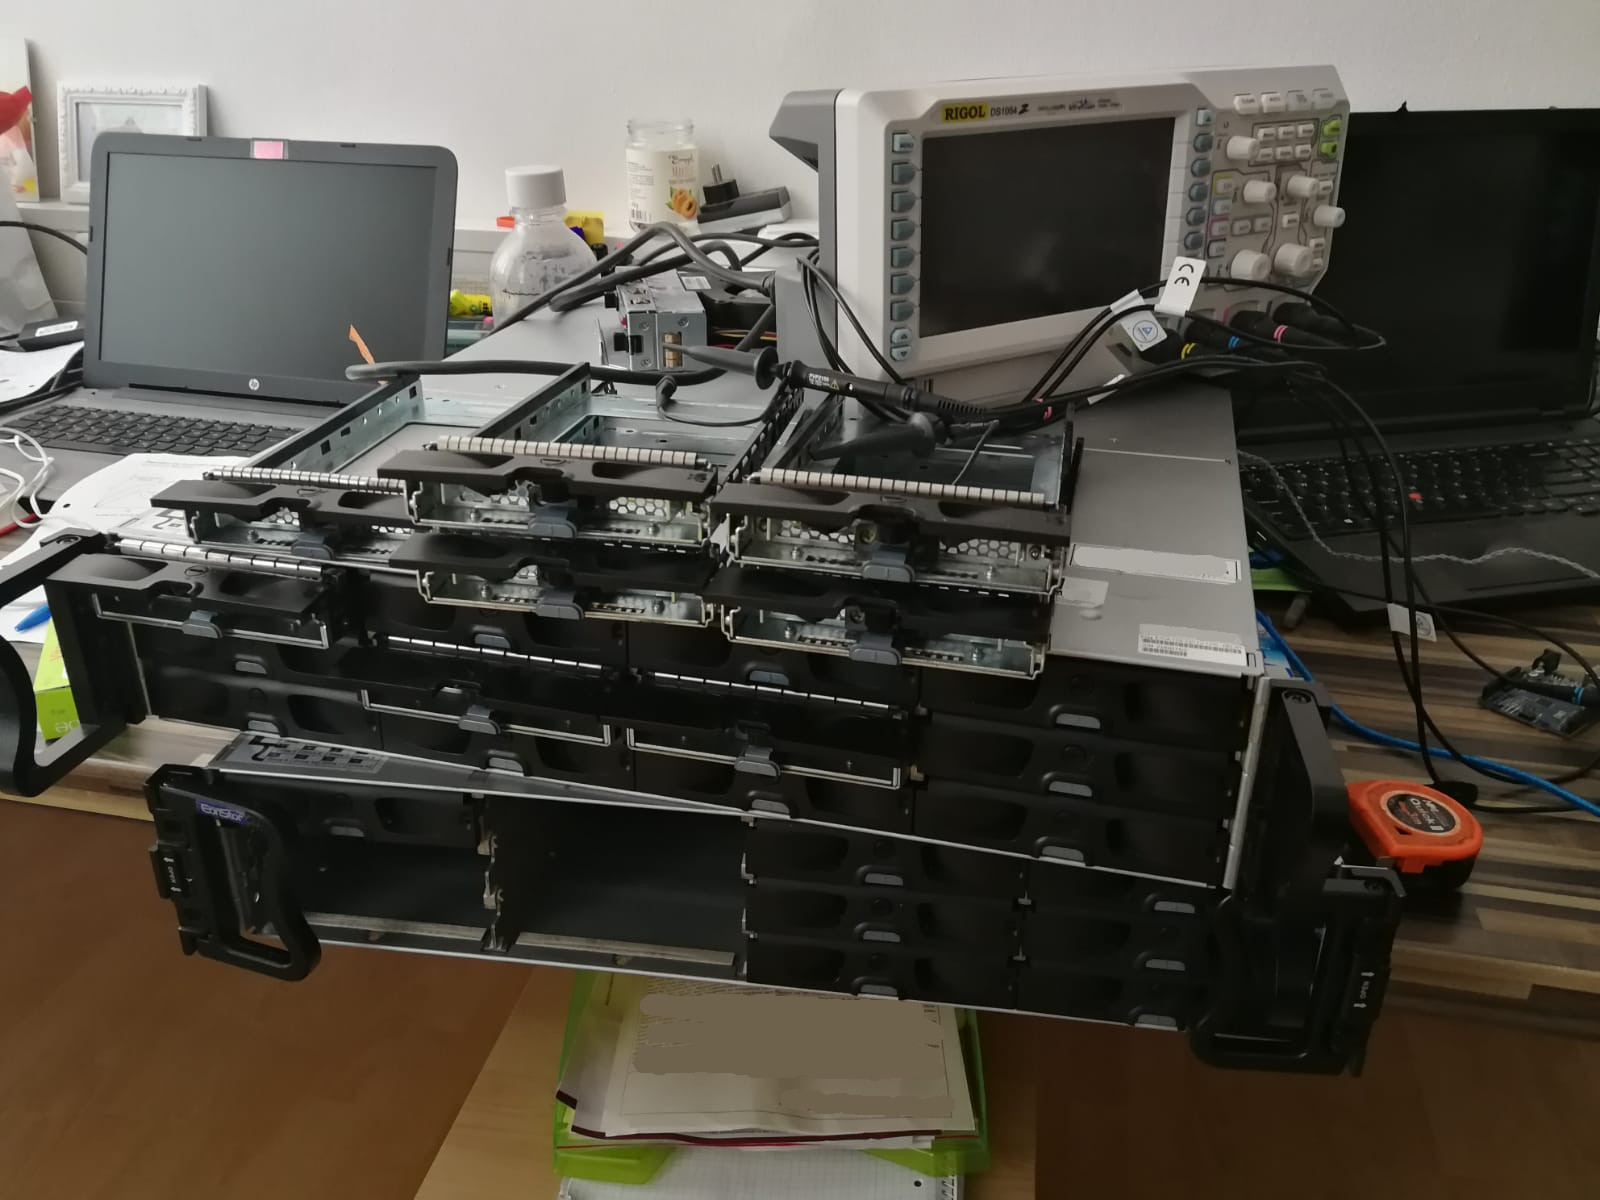
Then, the other day (like two months ago) I got two A12E-G2121 Disk Arrays from the local Craigslist equivalent for cheap. The seller was a really nice dude and even let me know that iSCSI is officially pronounced "EYE-skuz-ee".These SATA to iSCSI modules made by 'Infortrend' provice access to SATA drives over the network. They have a RAID controller built in, which can do up to RAID 5 with a cold spare. Unfortunately due to their age, there is virtually no information or documentation for them available on the net. I had pieced together some fragments of the manual over shady manual-hosting-sites, before directly asking the manufacturers techs to send me over some infos. Luckily they actually did that and I now have a complete manual, latest firmware and configuration tool for the thing, just shoot me a mail to get access: iq.quiescentcurrent
 gmail.com

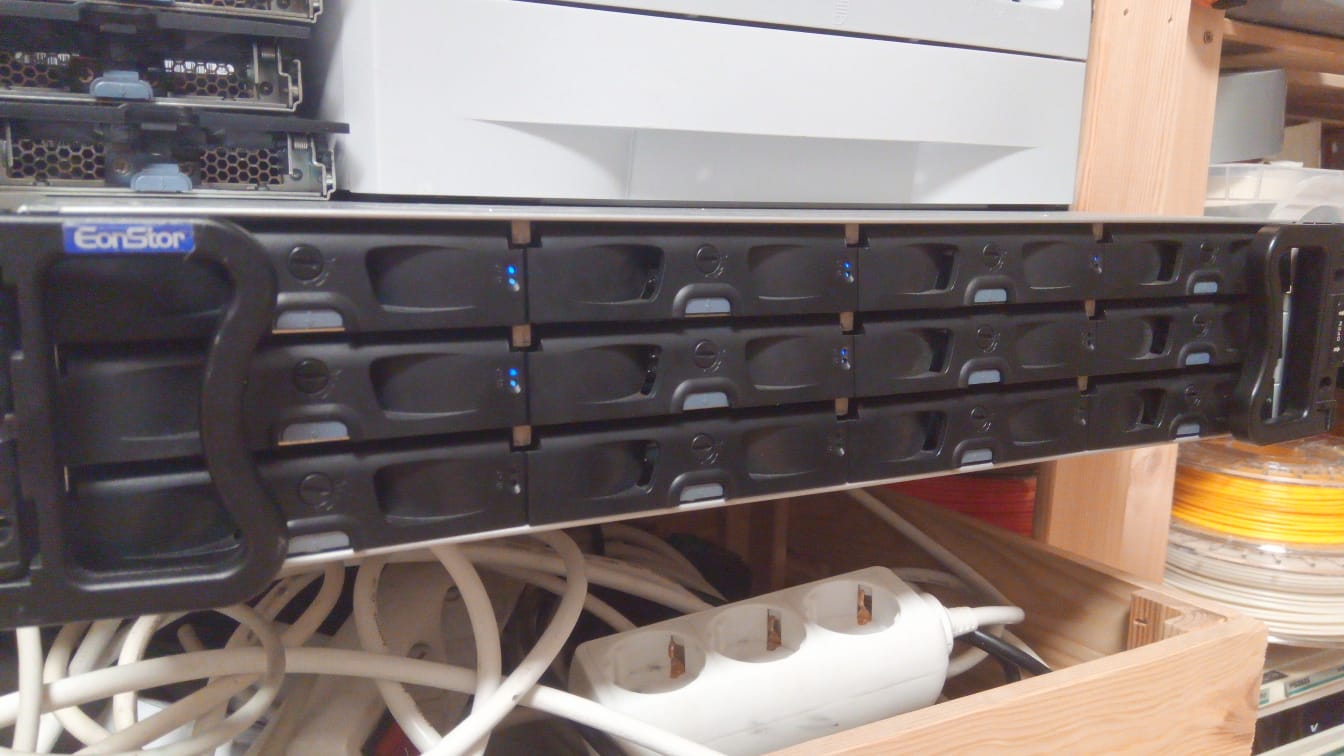
Photo of the rack
Don't forget to buy some HDDs, minimum of 4 for a RAID6, but the more the merrier. Also keep some spare ones in case you have a failing disk on a Sunday afternoon. Also it is recommended to buy dedicated drives often called 'NAS drive', '24/7',... Every manufacturer has their own line of 'higher quality' drives for this application.
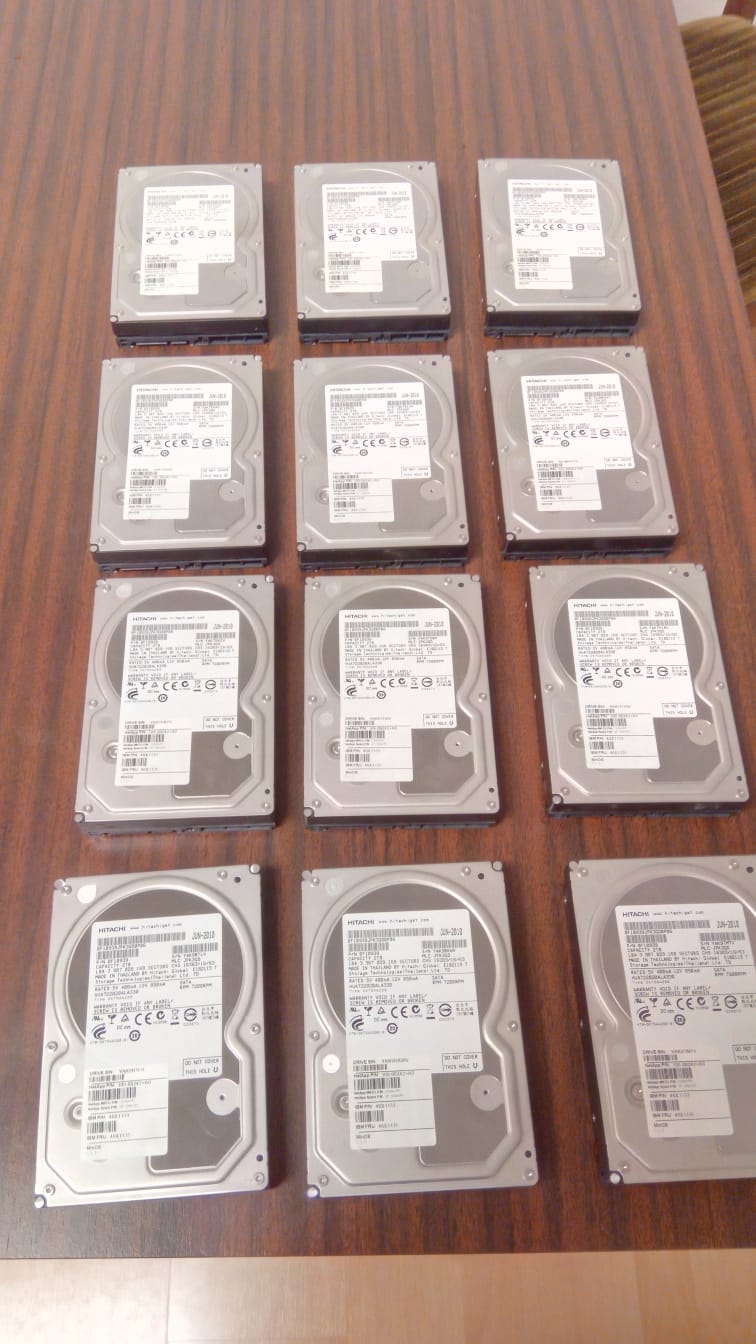
12 HDDs
For the RAID I decided to use 8 disks, that makes the space of 6 usable for me. The 4 others are kept as spares, or until we need more space.
Software Setup
The picture above shows an oscilloscope for a reason. If you haven't configured the EonStor, it will just beep annoyingly and definitely be not accessible over your network. There is a 3.5mm headphone jack on the back which offers a serial connection over RS485. This is the only way to get terminal access to the thing and I had to get some serious scope readings to be able to give you this knowledge.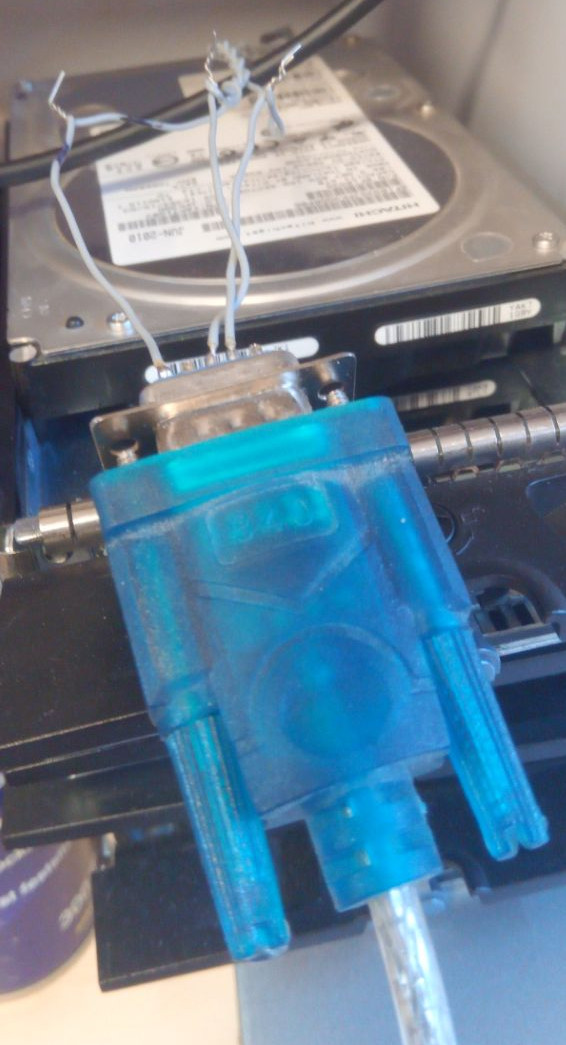
RS485 with a DB9 to 3.5mm jack adaptor contraption
With this I got to open a terminal and type the holy words:
> cu -l /dev/ttyUSB0 -s 38400
which offered me this beauty:
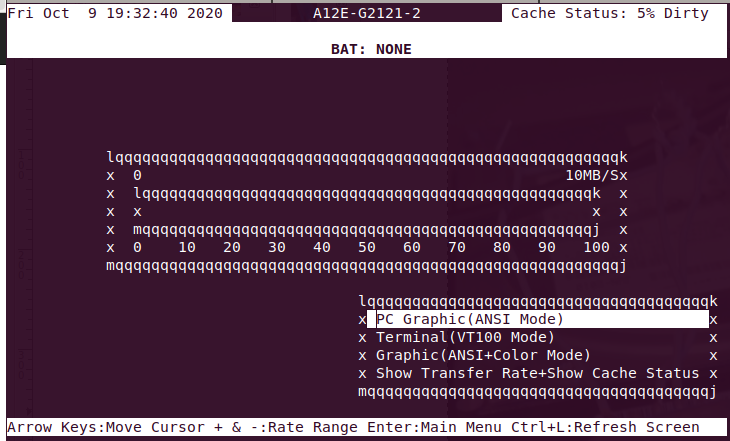
Administration Interface
From this point on I was able to configure the TCP/IP settings correctly and was able to connect over the network with ssh. The -o and -c options are legacy and not enabled by default anymore.
> ssh -oKexAlgorithms=+diffie-hellman-group1-sha1 -c 3des-cbc root@172.1.2.34
Let me tell you this is HEAVEN, finally a real connection!
RAIDWatch
RAIDWatch is the official GUI tool which can configure the disk array. It probably runs on Windows, but most importantly it works in Linux as a java application. So i let the installer run, which includes a JRE (java-run-environment) and everything, so I only was a bit of fiddeling to get it to start. Most importantly, it doesn't generate two files which prevent it from starting, so generate those manually:>touch /usr/local/Infortrend Inc/RAID GUI Tools/userconfig.ini
>touch /usr/local/Infortrend Inc/RAID GUI Tools/raidwatch.en.lang
After that, you can start the tool. To actually be able to connect to something you need to start it as root, the thing has no permissions otherwise. Add a "sudo" in front of the command in:
>nano /usr/local/Infortrend Inc/RAID GUI Tools/raidwatch.sh
and start it with
> sudo /usr/local/Infortrend Inc/RAID GUI Tools/raidwatch.sh
to fix this.
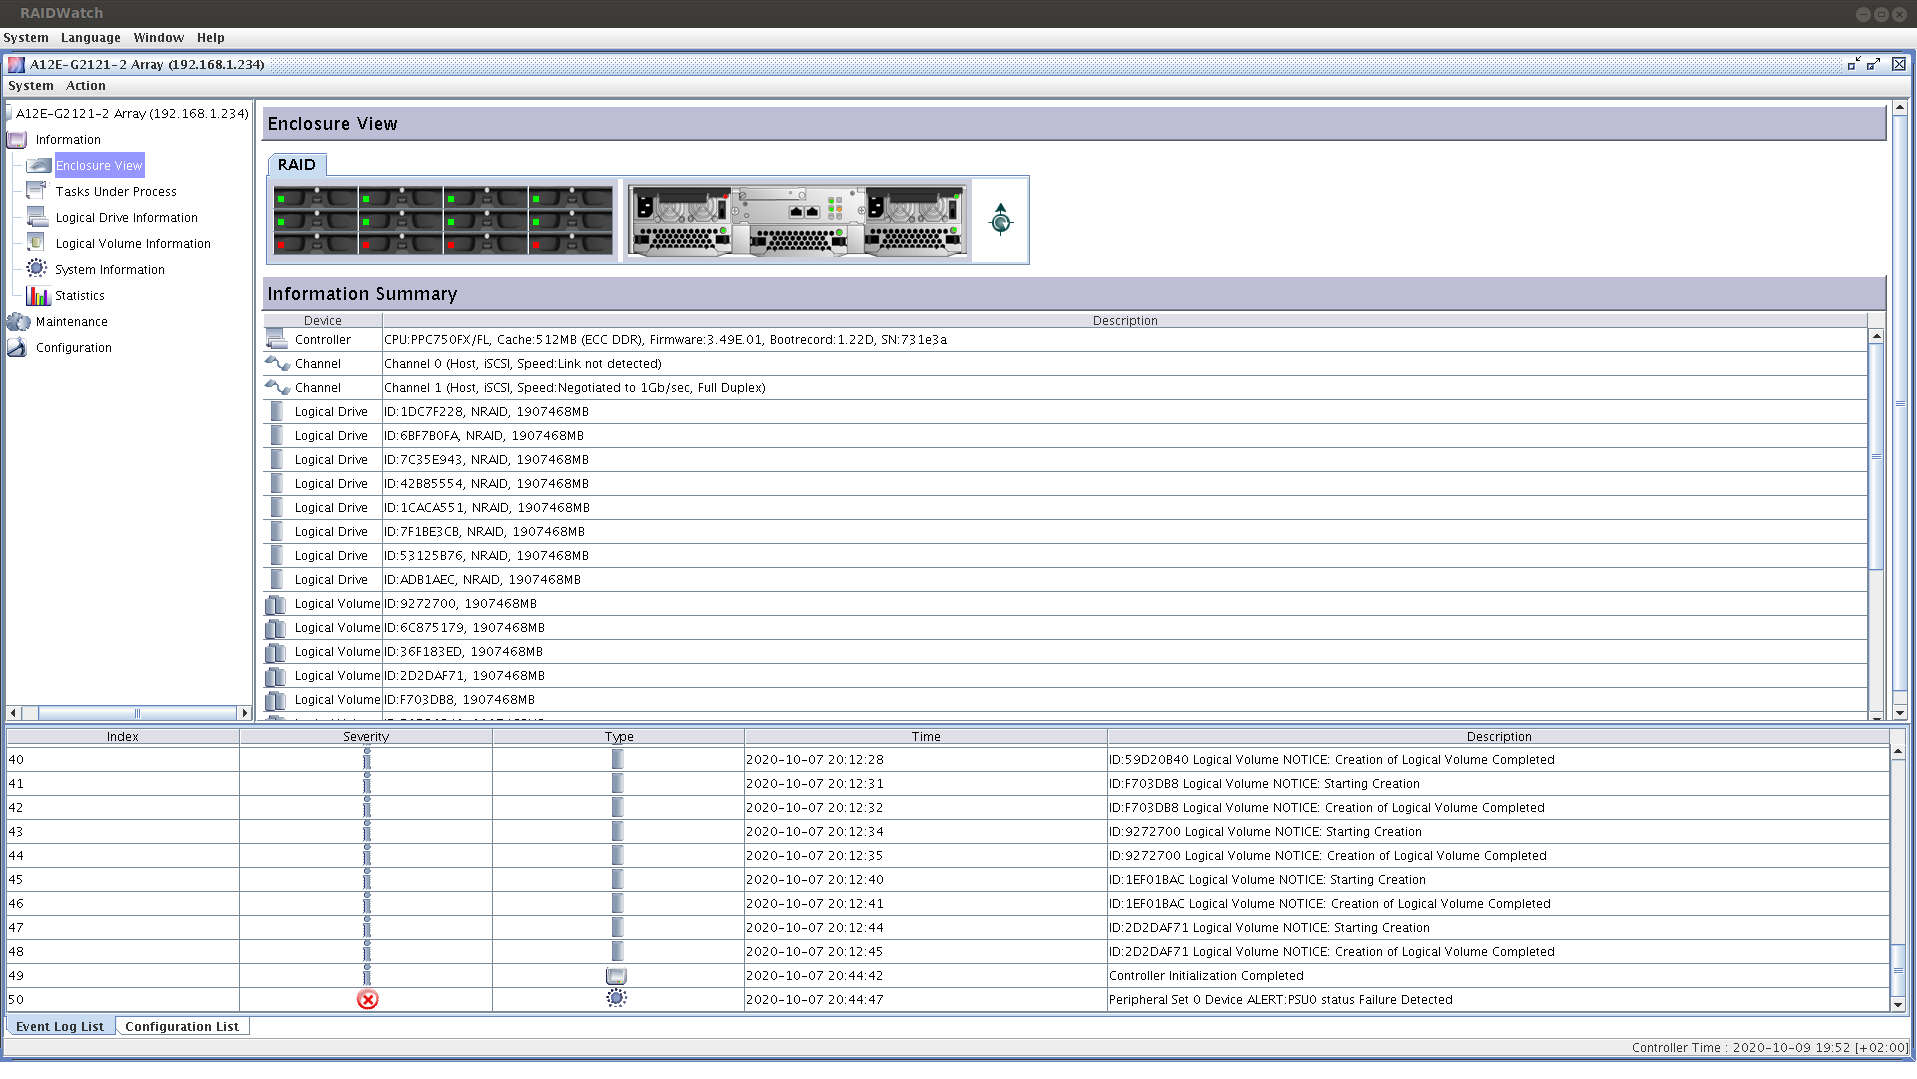
RAIDWatch GUI
Once running, RAIDWatch is straight forward to configure. Connect as "Configuration" user to get all features. It offers a Quick installation which is rather nice and lets you choose the RAID options you want:
RAID levels: 0, 1(0 + 1), 3, 5, 10, 30, 50, JBOD and non-RAID disk spanning
As I needed (read: wanted) a RAID6, I've just configured the disks and mapped them to 8 different LUNs, to be raided in software later. Make sure to have the correct channel ID according to the connected network port (I'm not kidding...).
Raspberry pi - iscsiadm
If you've never heard of iSCSI before you're not alone and probably born after its invention in 1885. This is why there are not a lot of tutorials out the describing how to automount 8 iSCSI drives on boot automatically on a Raspberry Pi. With not a lot I mean this is the only one at the time of writing this post (10.2020). This also means that I didn't have a guide to follow while setting this up (It's called paradox, look it up). Here's the steps I followed, stolen from here:> sudo apt install open-iscsi
> iscsiadm -m discovery -t sendtargets -p 172.1.2.34:3260 -d3
> iscsiadm -m node -T iqn.2007-10:iscsi.target0 -p 172.1.2.34:3260 --login
Then check if we have contact:
> iscsiadm --mode session
and see if the disks are here:
> blkid -o list
If they are larger than 2Tb use this instead:
> lsblk
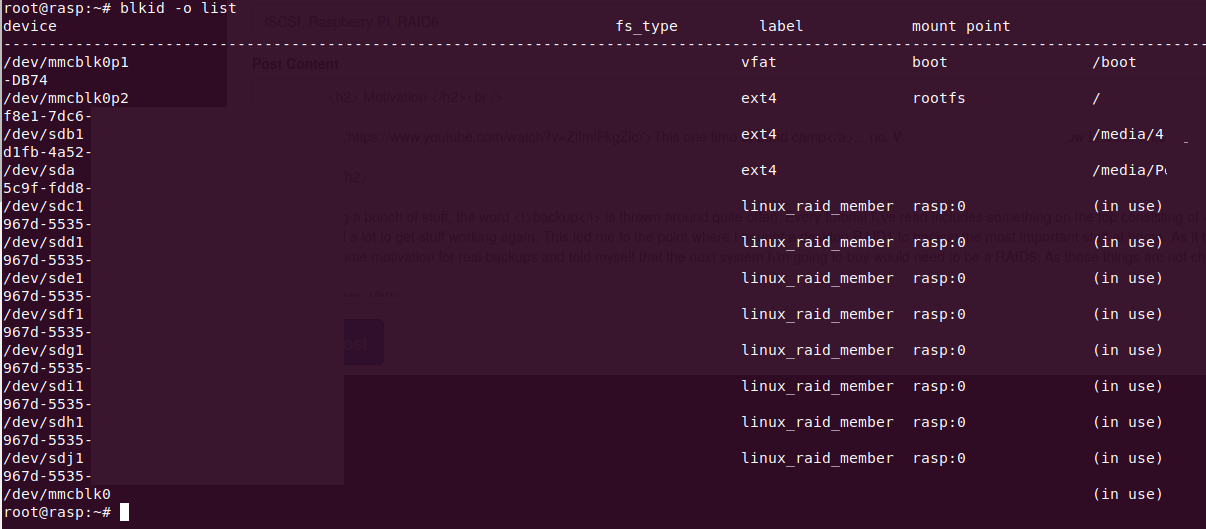
blkid with the new devices sdX
We can clearly see the 8 new drives sdc, sdd, sde, ...
To make this persistent between restarts, we want to set the iscsiadm to automatically mount. For this open the file and change:
> nano /etc/iscsi/iscsid.conf
Change node.startup from manual to automatic:
node.startup = automatic
Make sure that you have configured everything correctly. If you haven't then your Pi won't start and you have to remove the SD card and undo the changes on your computer manually. If you are sure about your config and the Pi is still not coming up, it took a while for mine to boot the first time I changed this. If it comes back up, this means we have almost won.
Raspberry pi - RAID6
Joining the disks into a RAID is actually the easy part. If you've managed to follow till here, there is no power in the 'verse that can stop you. We're firstly partitioning the drives:> fdisk /dev/sdc
Repeat this for all the drives sdc, sdd, sde,...
> apt install mdadm
> mdadm --create --verbose /dev/md0 --level=6 --raid-devices=8 /dev/sdc1 /dev/sdd1 /dev/sde1 /dev/sdf1 /dev/sdg1 /dev/sdh1 /dev/sdi1 /dev/sdj1
That's it. The RAID is being built! It may take a while though...
Check the status with:
> watch -d cat /proc/mdstat
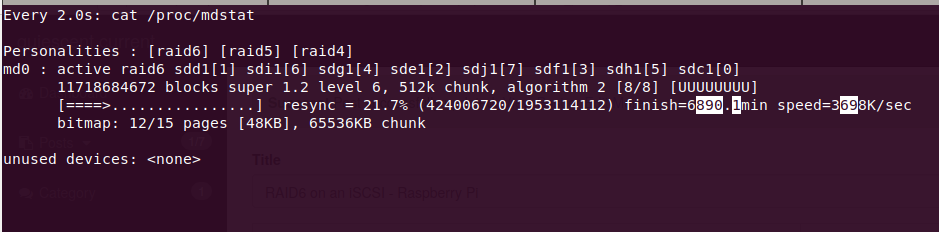
Resyncing the RAID
Yes. It takes almost 7000 minutes, that's 115 hours or ~5 days. Sit back and relax, there are tutorials on how to improve this, but none of them worked for me.
If you're restarting the Pi in the meantime, the RAID is mounted readonly to protect it. Remount it as readwrite:
> mdadm --readwrite /dev/md0
After being finished, create a file system on the device, create a mountpoint and add to to the automatically mounted devices:
> mkfs.ext4 /dev/md0
> mkdir /media/raid6
> nano /etc/fstab < add "/dev/md0 /media/raid6/ ext4 _netdev 0 0"
Watch out for the _netdev option, which specifies that the resource can only be mounted if a network is available.
Mount it and check if it worked:
> mount -a
> df -h
> mdadm --detail /dev/md0
And don't forget to add a MAILADDR so you get status mails if something goes wrong:
> nano /etc/mdadm/mdadm.conf
The final setup
DONE! You're really done, made it through the tutorial and hopefully were able to reproduce all the steps. It took me about two months including the communication with the company, buying the drives to getting everything to work. Writing this post is my part, so you can do it in one.