3D printed case for a Raspberry Pi with a 5 inch touch screen
by QC
Posted on Mon, April 13, 2020 - 09:34:38 PM
3D print Raspberry Pi touch screen
Motivation
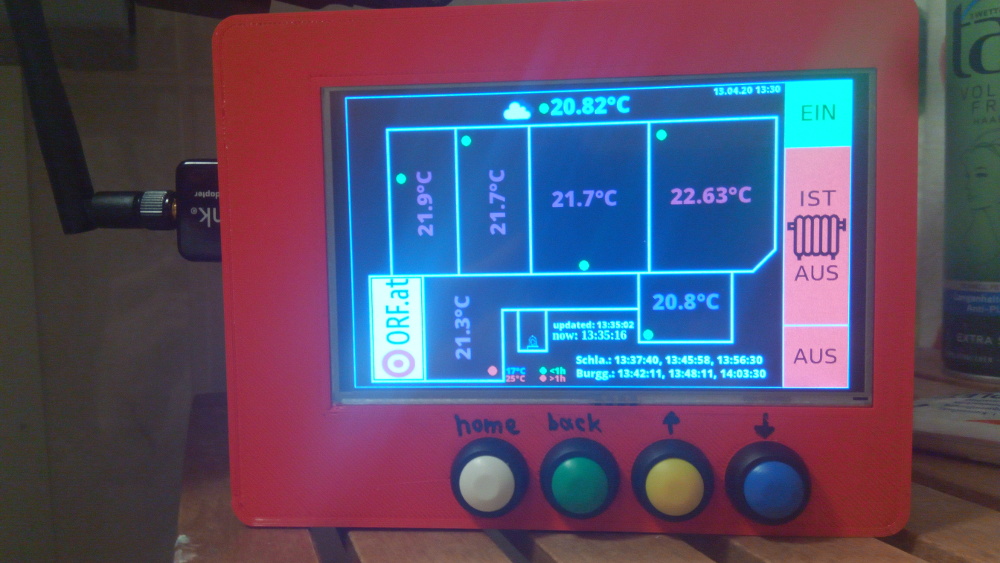
Like many others our flat has quite an interesting bit of home automation. To be able to get a quick overview I made a webpage which shows weather, central heating status, a public transport monitor and has some links to a news website:
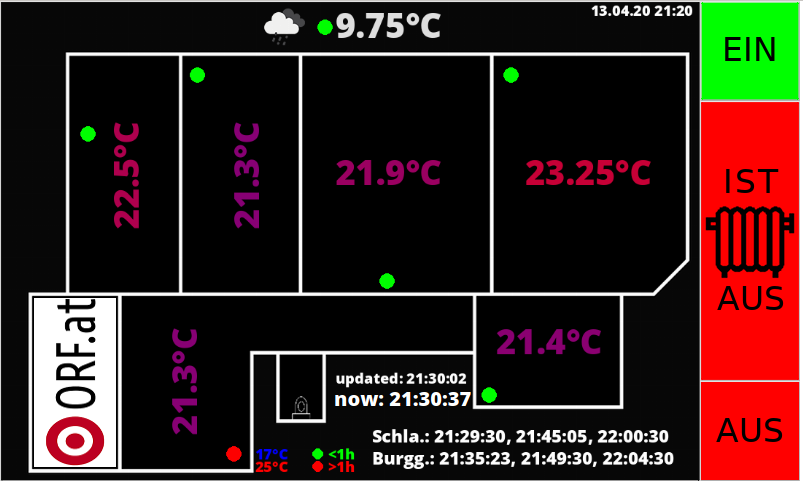
Screenshot of the tool.
3D printed parts
The parts are drawn in solid edge and exported as .stl. They and all the other files, code, photos,... can be found in the github repository. You can slice them yourself and take a look at my design skills or change the .par source files to fit your needs.The four screws are meant to be M3 x 20, if you don't have those just use any reasonably sized ones. They are responsible for holding in the LCD by applying pressure to the back of the raspberry, I've applied some sticky foam tape on the back cover so the Pi can't wiggle around, but without should also be fine.
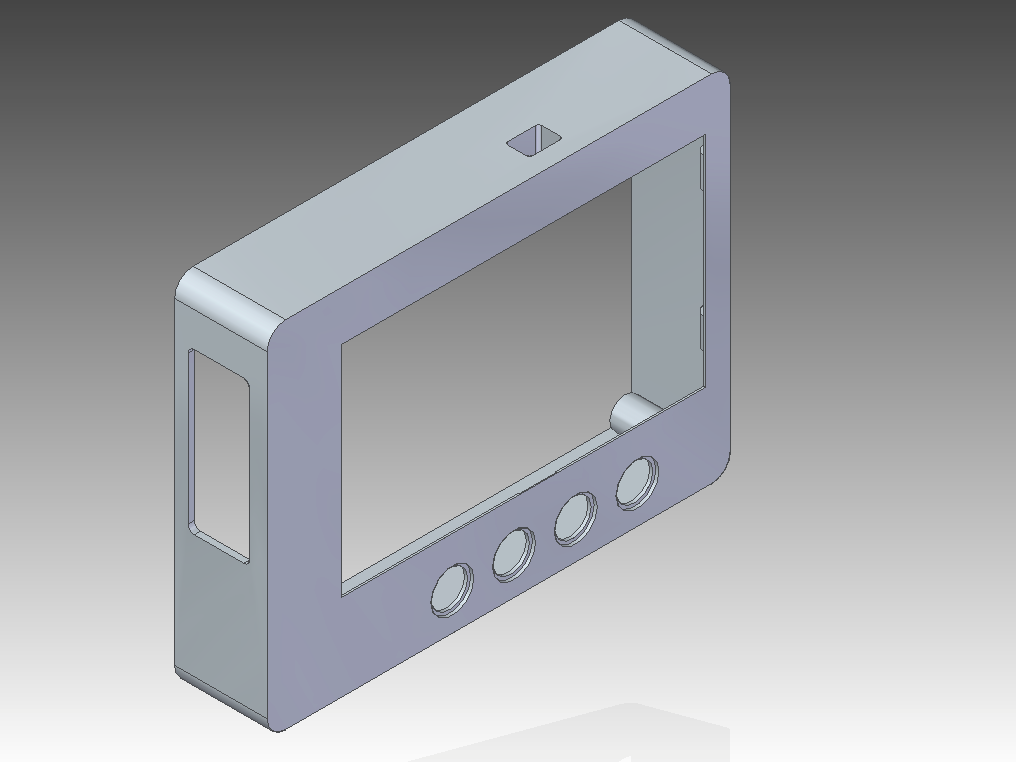
Rendering of the case front
The LCD it quite a perfect fit if printed on my lulzbot mini, maybe you have to play around a bit with the settings. All the other openings should have some room for error, the micro USB has an internal guide so you can plug it in without having to look.

Rendering of the case back
Hardware
I've used a Raspberry Pi 2, but a Pi 3 or 4 should also work. The Display can be pushed directly onto the RPi pins for power and a small HMDI connector was supplied with it. Please make sure to order the right one (HDMI<->HDMI or HDMI<->micro HDMI)The LC-Display is a 5 inch resistive touchscreen, which can be bought for around 25$ from ebay, amazon or any other local electronics store.
The fours buttons are 12mm types, ebay also is your friend here, but any electronic component supplier has those.
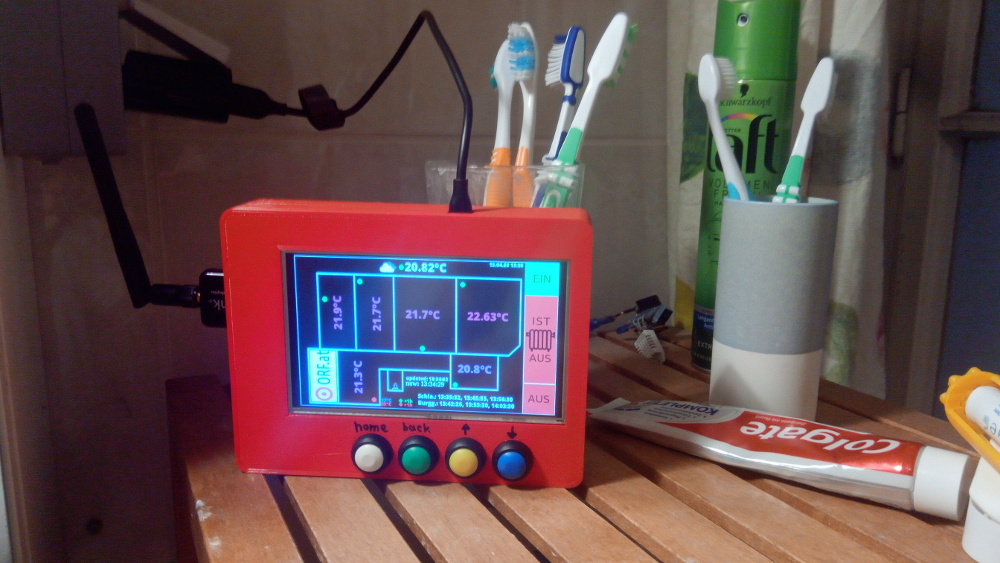
Photo of the unit in its natural habitat
Software
All the code I wrote obviously also is in the github repository, just go from there if you want to do this yourself.The touchscreen should work more or less natively out of the box. If it doesn't or you're unsure about how to setup up your pi, use this instructables.com tutorial. It starts right at the beginning with formatting your SD card and should bring you up to spec with actually inputting stuff over the touch screen.
I've written three files which are important for the function:
- buttonWatch.py: This is a small Python script used to detect pressed buttons and translate them into virtual keyboard presses. Those are in order to operate the chromium / chrome webbrowser which hosts the infoscreen page. The script can 'scroll down', 'scroll up' , 'go to homepage' and 'go back'. The buttons are mapped to four free pins (6,13,19,26) on the RPi header, which are not used by the LCD. You need to install pynput which emulates a keyboard with:
> pip install pynput - startChromium.sh: Starts the buttonWatch.py and then chromium browser in Kiosk mode. It disables the mouse pointer and a few things so it looks nice while idling. Chromium is used for its flexibility and native kiosk mode. The autoupdate has to be disabled and your desired home page has to be set as homepage.
- autostart: this file is the windowmanager (LXDE) autostart procedure and should be copied to .config/lxsession/LXDE-pi/autostart in order for it to be executed when the pi has finished booting up. It basically starts the wifi (only necessary on the Pi2) and then the chromium browser startup script.
Conclusion
I hope this tutorial has helped you or at least gave you an idea on how to make something like this yourself. In case you have any questions, just leave a comment or write me a mail to iq.quiescentcurrent gmail.com.
All the best,
QC